3D rendering is the process of creating photorealistic images from three-dimensional digital models using specialized software and computer hardware. To get started with 3D rendering, you need a computer with sufficient processing power (CPU and GPU), 3D modeling and rendering software, and the technical skills to operate these tools effectively. The specific requirements vary depending on your project’s complexity and quality expectations.
Why is poor visual content limiting your product sales potential?
Low-quality product images and limited customization options are silently driving customers away from your brand every day. When potential buyers can’t properly visualize your products or see how different configurations look, they hesitate to make purchase decisions, leading to abandoned shopping carts and lost revenue. Traditional photography struggles to keep up with product variations, leaving gaps in your visual catalog that competitors with better 3D rendering capabilities can exploit. The cost becomes even steeper when you consider that customers who can’t properly evaluate products online often don’t convert to sales, forcing you to rely heavily on expensive physical showrooms and samples to close deals.
What does inconsistent product visualization signal about your brand positioning?
When your product visuals vary in quality, lighting, or style across different channels, it sends a message that your brand lacks attention to detail and professional standards. This inconsistency becomes particularly damaging for premium brands, where visual excellence directly impacts perceived value and customer trust. Mismatched imagery between your website, catalogs, and retail environments creates confusion and undermines the cohesive brand experience that drives customer confidence. The solution lies in implementing a unified 3D rendering system that ensures every product visualization maintains the same high standard and visual consistency across all touchpoints.
What is 3D rendering and why do you need it?
3D rendering transforms digital three-dimensional models into realistic two-dimensional images through complex mathematical calculations that simulate lighting, materials, and camera perspectives. This technology has become essential for businesses because it eliminates the limitations and costs of traditional photography while providing unlimited flexibility for product visualization.
Unlike conventional photography, 3D rendering allows you to create perfect product images without physical prototypes, studio setups, or multiple photoshoots. You can generate images of products in any color, material, or configuration instantly, making it particularly valuable for businesses offering customizable products. The technology also enables you to create impossible shots, such as cutaway views showing internal components or dramatic lighting scenarios that would be difficult or expensive to achieve with traditional photography.
For businesses, 3D rendering provides scalability that photography cannot match. Once you have digital models created, you can generate unlimited variations and angles without additional production costs, making it perfect for e-commerce catalogs, marketing materials, and interactive product experiences.
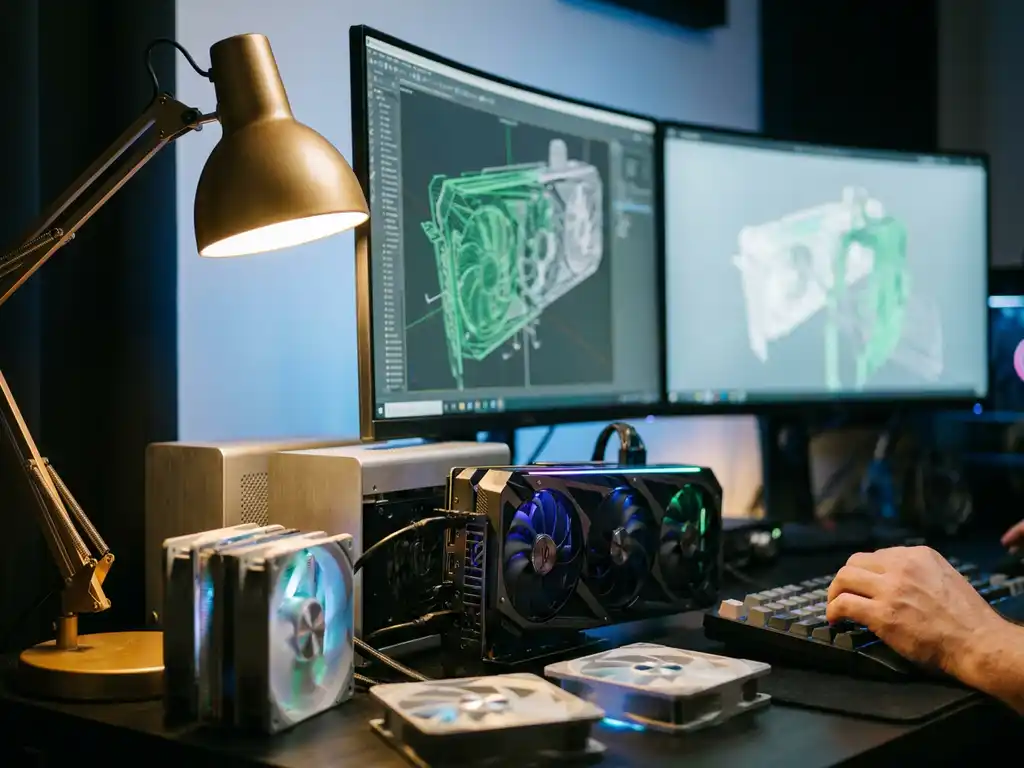
What hardware do you need for 3D rendering?
The hardware requirements for 3D rendering depend on your project’s complexity and time constraints, but certain components are essential for effective rendering performance.
Your graphics processing unit (GPU) is the most critical component for modern 3D rendering. Professional-grade GPUs like the NVIDIA RTX series or AMD Radeon Pro cards provide the CUDA cores or OpenCL support needed for GPU-accelerated rendering. For basic product visualization, a mid-range RTX 4060 or similar can handle most tasks, while complex scenes with advanced lighting require high-end cards like the RTX 4080 or RTX 4090.
CPU performance remains important for scene preparation and certain rendering engines. Multi-core processors like the Intel Core i7 or AMD Ryzen 7 series provide the parallel processing power needed for complex calculations. RAM requirements start at 16GB for basic work, but professional rendering often demands 32GB or more, especially when working with high-resolution textures and complex scenes.
Storage considerations include fast SSD drives for active projects and ample storage space for texture libraries and rendered output files. A dedicated SSD for your current project files significantly improves software responsiveness and file loading times.
Which 3D rendering software should you choose?
The choice of 3D rendering software depends on your specific needs, budget, and technical expertise level. Different applications excel in various areas of 3D visualization and product rendering.
For product visualization and commercial rendering, Blender offers a powerful, free solution with advanced rendering engines like Cycles and Eevee. Its active community and extensive documentation make it accessible for beginners while providing professional-grade capabilities. Autodesk Maya and 3ds Max remain industry standards for complex product visualization, offering robust modeling tools and rendering engines like Arnold.
Specialized product rendering software includes KeyShot, which excels at material visualization and provides real-time rendering capabilities perfect for product development workflows. Cinema 4D offers excellent integration with design workflows and intuitive interfaces for motion graphics and product animation.
Cloud-based rendering solutions have emerged as alternatives for businesses wanting professional results without heavy hardware investments. These platforms allow you to upload scenes and render them on powerful remote servers, though they require ongoing subscription costs and internet connectivity.
What skills do you need to learn 3D rendering?
Successful 3D rendering requires a combination of technical knowledge, artistic understanding, and problem-solving abilities that develop through structured learning and practice.
Technical skills include understanding 3D modeling fundamentals, material creation and assignment, lighting principles, and camera composition. You need to learn how different rendering engines work, including settings for quality versus speed optimization. Understanding file formats, texture mapping, and UV unwrapping becomes essential for creating realistic materials and surfaces.
Artistic skills involve color theory, composition principles, and understanding how light behaves in real environments. Photography knowledge helps tremendously, as many rendering principles mirror traditional photography techniques. Understanding how materials interact with light, including concepts like subsurface scattering, reflection, and refraction, enables you to create convincing product visualizations.
Workflow optimization skills help you work efficiently, including scene organization, asset management, and render optimization techniques. Learning keyboard shortcuts, using render layers, and understanding batch rendering processes significantly improve productivity as projects become more complex.
How long does it take to create professional 3D renders?
The timeline for creating professional 3D renders varies significantly based on project complexity, quality requirements, and your experience level, but understanding typical timeframes helps with project planning.
Simple product renders for e-commerce might take 2-4 hours per image, including modeling, material creation, lighting setup, and final rendering. This assumes you’re working with relatively straightforward products and have established workflows. Complex products with intricate details, multiple materials, or advanced lighting scenarios can require 8-12 hours or more per final image.
The initial setup phase often takes the longest, especially when creating new 3D models from scratch. Once you have established models and material libraries, generating variations becomes much faster. Professional studios often invest significant time upfront in creating comprehensive digital assets that can be reused and modified for multiple projects.
Rendering time itself depends on image resolution, quality settings, and hardware capabilities. Simple scenes might render in minutes, while high-resolution, photorealistic images can take several hours. Many professionals use overnight rendering for final high-quality outputs while working with faster preview settings during the creative process.
Hoe 3Dimerce helpt met 3D rendering
We specialize in eliminating the complexity and technical barriers of 3D rendering through our comprehensive visual product experience platform. Rather than requiring you to master complex software and invest in expensive hardware, our SaaS solution delivers professional-grade 3D product visualization that integrates seamlessly into your existing workflows.
Our platform provides:
- Blazing-fast rendering capabilities that generate stunning product visuals in real time
- Professional CGI quality that matches or exceeds traditional photography standards
- Unlimited product configurations without additional rendering costs
- Seamless integration with e-commerce platforms and point-of-sale systems
- No technical expertise required from your team
With over 20 years of experience in virtual art and CGI, we handle all the technical complexity while you focus on growing your business. Ready to transform your product visualization without the learning curve? Contact us to discover how our platform can deliver professional 3D rendering results for your products today.
Frequently Asked Questions
What's the difference between real-time rendering and traditional rendering for product visualization?
Real-time rendering generates images instantly as you make changes, allowing for interactive product configurators and immediate visual feedback. Traditional rendering produces higher quality images but requires processing time, making it better for final marketing materials. For e-commerce applications, real-time rendering provides the best user experience by letting customers see product changes immediately.
How do I ensure my 3D renders match the actual product colors and materials accurately?
Accurate color matching requires proper monitor calibration, understanding of color spaces (sRGB vs Adobe RGB), and creating material libraries based on real-world samples. Use color reference charts during rendering and test your outputs on different devices. Professional workflows often include physical color matching sessions where rendered samples are compared to actual products under controlled lighting conditions.
Can I use 3D rendering for products that don't exist yet or are still in development?
Yes, this is one of 3D rendering's biggest advantages for product development. You can create photorealistic visualizations from CAD files, concept sketches, or technical specifications before manufacturing begins. This allows for marketing campaigns, pre-orders, and stakeholder presentations while the product is still being developed, significantly accelerating time-to-market.
What are the most common mistakes beginners make when starting with 3D product rendering?
Common mistakes include using unrealistic lighting setups, applying materials incorrectly, and not optimizing render settings for their intended use. Many beginners also underestimate the importance of proper scene scale and camera positioning. Starting with simple products and focusing on mastering lighting and materials before moving to complex scenes helps avoid these pitfalls.
How do I handle 3D rendering for products with transparent or reflective materials like glass or metal?
Transparent and reflective materials require special attention to lighting and environment setup. Use HDRI environments for realistic reflections, adjust the Index of Refraction (IOR) values correctly for different materials, and consider the render engine's capabilities for handling caustics and complex light paths. These materials often require higher quality settings and longer render times to look convincing.
What's the best way to organize and manage large numbers of 3D product renders and assets?
Implement a structured file naming convention, use version control for 3D models and scenes, and maintain organized folder hierarchies by product categories. Create standardized material libraries and lighting setups that can be reused across projects. Consider using digital asset management (DAM) systems to track renders, metadata, and approval workflows, especially for teams or large product catalogs.
How do I optimize 3D renders for different platforms like websites, print, and social media?
Each platform requires different specifications: web images need smaller file sizes and sRGB color space, print materials require high resolution and CMYK color profiles, while social media platforms have specific aspect ratios and compression requirements. Create rendering templates with appropriate resolution and quality settings for each use case, and always render at the highest quality first, then optimize down for specific platforms.