
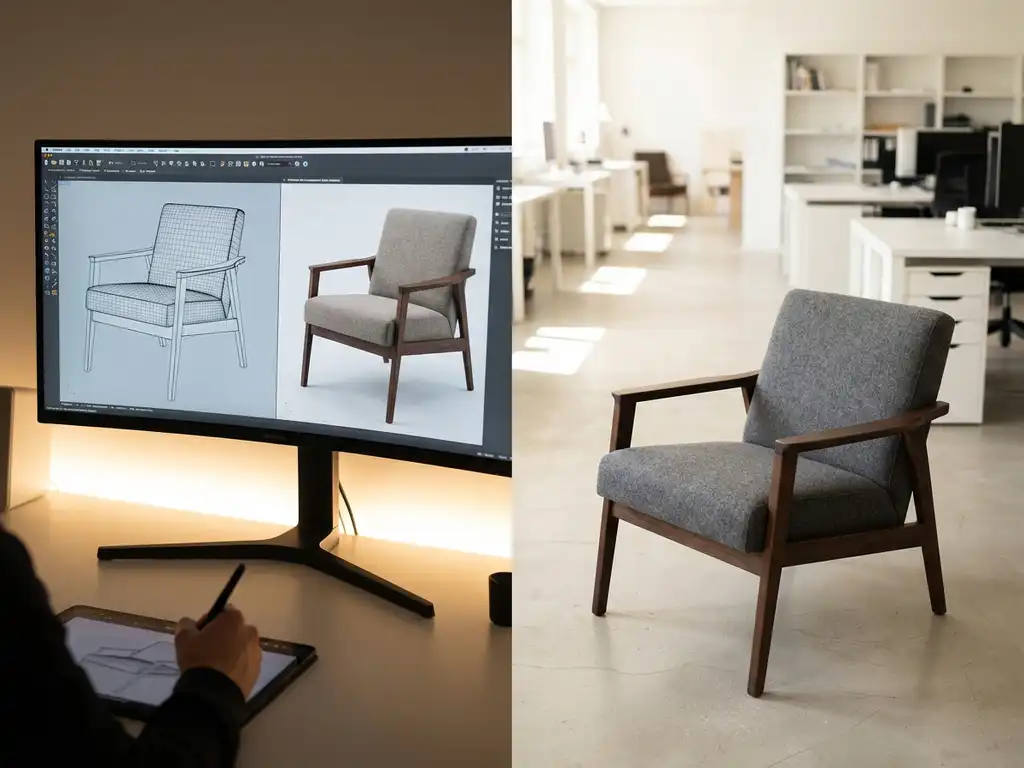
3D product rendering creates professional product rendering results — photorealistic digital images of products using computer graphics technology. Start by gathering product specifications and 3D models, then choose appropriate software that matches your technical capabilities and business needs. Most businesses can begin implementing a basic 3D product rendering beginner setup within 2–4 weeks with proper planning and resources.
What is 3D product rendering and why should businesses use it?
3D product rendering is the process of creating photorealistic digital images from three-dimensional computer models. This technology transforms technical CAD (Computer-Aided Design) files or 3D models into high-fidelity visual content that showcases products with accurate materials, lighting, and environmental settings — without requiring physical prototypes or photography studios.
The core benefits make 3D rendering increasingly attractive for modern businesses. Traditional photography requires physical prototypes, studio setups, and costly reshoots for every product variation. 3D product rendering and visualisation eliminates these constraints by generating unlimited product configurations digitally. Whether you are building a product rendering studio in-house or partnering with a managed platform, the quality of your rendered products directly impacts customer trust and purchase confidence.
Cost savings represent the most immediate advantage. Industry benchmarks consistently show that e-commerce brands switching from traditional photography to 3D rendering report reductions in per-variant content costs of 40–70% after the first year. Once you create a 3D model, you can produce hundreds of product variations without additional photography expenses — a scalability advantage that is particularly valuable for businesses offering customisable products or extensive colour options.
Customer engagement improves significantly when shoppers can visualise products accurately. Interactive 3D product visuals have been associated with conversion rate uplifts of 20–40% in furniture and home goods categories. Return rates for products with 360-degree or configurable 3D views are typically 25–30% lower than those with static images, because accurate visualisation sets the correct expectations before purchase. These are the measurable outcomes that make the business case for 3D rendering compelling for decision-makers across marketing and e-commerce.
From 3D rendering to augmented reality: extending your product visuals
Once a high-quality 3D model is created for rendering purposes, the same asset can be repurposed for augmented reality (AR) experiences — allowing shoppers to place a sofa, lamp, or decorative piece in their own room using a smartphone. This transforms static rendered products into interactive, immersive touchpoints that further reduce purchase hesitation.
AR-ready 3D assets require specific file formats, such as USDZ for iOS and GLB for Android, and platforms supporting complex 3D asset integration while keeping implementation timelines under three months are rare but available. This is where 3D product rendering and visualisation converges with omnichannel commerce strategy. We support omnichannel deployment including AR-ready asset delivery, positioning 3Dimerce as a vendor that bridges professional product rendering and interactive AR visualisation — all within a single managed platform.
3D product rendering vs. traditional product photography: which is right for your business?
For businesses evaluating whether to invest in 3D rendering, a direct comparison with traditional photography clarifies the decision quickly. The two approaches differ fundamentally across five dimensions: upfront cost, cost per product variation, time to market, scalability, and flexibility for customisation.
Upfront cost is typically higher for 3D rendering during the initial model creation phase, but this investment pays back rapidly at scale. Traditional photography appears cheaper for a single hero shot, but costs compound with every new variant, colourway, or scene. A full photography shoot for a furniture collection with 12 variants can take days and cost thousands, while the same variants in 3D are produced from a single approved model by changing materials digitally in minutes.
Time to market favours 3D rendering decisively once your model library is established. Traditional photography requires a physical sample and studio booking for every new colourway — a process that can take weeks. With 3D rendering, a new finish or configuration can be rendered and published within hours. Scalability follows the same logic: as your product range grows, 3D rendering costs remain relatively flat while photography costs scale linearly. Flexibility for customisation is where 3D rendering is simply unmatched — real-time product configurators, interactive views, and AR deployment are impossible with static photography.
| Dimension | Traditional Photography | 3D Rendering |
|---|---|---|
| Upfront cost | Lower per shoot | Higher initial model creation |
| Cost per variation | High — new shoot required | Low — material swap on existing model |
| Time to market | Days to weeks per variant | Hours once model is approved |
| Scalability | Costs scale with range size | Costs remain relatively flat |
| Customisation flexibility | Limited to physical samples | Unlimited digital configurations |
3Dimerce delivers all of the rendering advantages in this comparison without the technical overhead — making the transition from traditional photography straightforward for premium brands that need to move fast without compromising on visual quality.
What do you need to get started with 3D product rendering?
Getting started with 3D product rendering requires four core components: accurate product specifications, 3D models or CAD files, appropriate rendering software, and team members with basic technical skills. Most businesses can begin with existing product documentation and learn rendering software through structured training programmes.
Product specifications and reference materials
Product specifications form the foundation of quality rendering. You need detailed measurements, material information, colour specifications, and high-resolution reference images. The more accurate your source materials, the more photorealistic your final rendered products will be.
Visual Commerce Solutions
Talk to our team about your project.
3D models and CAD files
3D models serve as the digital foundation for rendering. If you manufacture products, existing CAD files from your design process work perfectly. Companies without CAD files can commission 3D modelling services or create models using photogrammetry — a technique that reconstructs a 3D model from multiple product photographs.
Software and team skills
Software selection depends on your complexity requirements and budget. Professional options range from user-friendly platforms designed for businesses to advanced rendering engines used by design studios. Many modern solutions offer cloud-based rendering that eliminates the need for powerful local hardware.
Team skills can be developed progressively. Start with one team member learning basic rendering concepts, then expand knowledge across your marketing and product teams. Most platforms provide comprehensive training resources and customer support during implementation.
How do you start with 3D product rendering step by step?
A structured approach is the most reliable way to move from zero to a functioning 3D product rendering beginner setup — and then to a fully scaled professional workflow. The following eight steps guide you through the complete process, whether you are a first-time implementer or an enterprise team evaluating a platform migration.
Step 1: Audit your existing product assets
Begin by inventorying what you already have: CAD files, technical drawings, measurements, and material specifications. The quality and completeness of your source assets directly determines how quickly 3D model creation can begin and how accurate your rendered products will be.
Step 2: Define your rendering goals
Clarify the scope before selecting any tools. Determine how many SKUs you need to render, which output formats are required (static images, 360-degree views, AR assets), and which sales channels will use the content. Clear goals prevent scope creep and keep implementation timelines realistic.
Step 3: Select a rendering software or SaaS platform
Choose a platform that matches your team’s skill level, budget, and scalability requirements. For premium brands that need professional product rendering quality without deep in-house 3D expertise, a fully managed SaaS solution is almost always the faster and more cost-effective path.
Step 4: Commission or prepare your first 3D models
If you have existing CAD files, prepare them for rendering by cleaning geometry and applying initial material assignments. If you are starting from scratch, commission 3D modelling from a specialist — begin with one or two hero products to validate quality before scaling. This is a critical quality gate in any 3D product rendering and visualisation workflow.
Step 5: Configure materials, lighting, and scene settings
Apply accurate material definitions — fabric weaves, wood grains, metal finishes — and configure lighting to match your brand’s visual language. Use a test product to establish your scene template, which will then be reused consistently across your full range.
Step 6: Review and refine the test render
Evaluate the test render against your brand standards and product accuracy requirements. Involve stakeholders from marketing, product, and e-commerce at this stage. Document the refinements needed and apply them before proceeding — changes made now cost far less than corrections made after scaling.
Step 7: Scale to your full product range
With an approved scene template and material library in place, apply your established style guidelines systematically across your full product range. Professional product rendering at scale requires disciplined asset management and version control to maintain consistency.
Step 8: Integrate rendered assets into your channels
Deploy your rendered products across e-commerce platforms, digital catalogues, marketing campaigns, and — where applicable — AR experiences. Ensure your rendering system integration connects directly with your PIM or e-commerce platform to automate asset distribution and reduce manual handling.
How do you choose the right 3D rendering software for your business?
The right 3D rendering software balances ease of use, visual output quality, integration capabilities, and budget. Evaluate platforms based on your team’s technical expertise, product complexity, and long-term scalability requirements — not solely on features or price.
Entry-level and SaaS-based platforms
Entry-level cloud-based platforms are designed for small teams and businesses with limited budgets and no dedicated 3D expertise. They offer fast onboarding, intuitive interfaces, and self-service workflows that allow marketers to produce rendered products without specialist training. The trade-off is that photorealism and customisation depth are typically limited — acceptable for simple products but insufficient for high-end design or luxury goods where material accuracy is critical to brand perception.
Professional studio-grade rendering engines
Professional desktop rendering engines — used by design studios and visualisation specialists — deliver exceptional photorealism and creative control. They support complex lighting setups, advanced material shaders, and high-resolution output suitable for print and large-format display. However, they require significant hardware investment, steep learning curves, and dedicated 3D artists to operate effectively. For most e-commerce and marketing teams, the overhead of running an in-house product rendering studio at this level is difficult to justify.
Fully managed rendering solutions
Fully managed SaaS platforms handle rendering infrastructure, quality assurance, and rendering system integration on behalf of the client. This category is purpose-built for brands that need premium visual quality and fast implementation without building internal 3D capabilities. Enterprise teams facing product rendering software challenges — particularly around integration complexity, visual consistency, and speed to market — consistently find that managed solutions reduce total cost of ownership compared to assembling separate tools. 3Dimerce operates in this category, delivering a complete product rendering studio experience as a turnkey service for premium brands in the furniture and design space.
Integration capabilities affect workflow efficiency across all three categories. Choose software that connects with your existing systems, including e-commerce platforms, product information management (PIM) systems, and marketing tools. Seamless rendering system integration reduces manual work and maintains consistency across sales channels.
Visual output quality must match your brand standards. Request sample renders using your actual products before making a decision. Pay attention to material accuracy, lighting quality, and overall photorealism. Higher-end solutions typically produce more convincing results but require greater investment.
Scalability considerations include rendering speed, file-handling capacity, and pricing structures. Consider how the platform will perform as your product range grows and rendering demands increase. Some solutions charge per image, whilst others offer unlimited rendering within subscription models.
What are the most common challenges when starting with 3D product rendering?
The most common challenges when implementing 3D product rendering are technical learning curves, managing quality expectations, integrating rendering workflows with existing business systems, and maintaining visual consistency across a growing product range. Most obstacles can be overcome through phased implementation, realistic timelines, and early investment in training.
Overcoming the technical learning curve
Technical learning curves affect teams unfamiliar with 3D concepts. Start with simple products and basic rendering setups before attempting complex materials or lighting scenarios. Invest time in training and consider working with experienced 3D rendering specialists during the initial implementation phases.
Managing quality expectations
Quality expectations often exceed early results. Professional-grade rendering requires practice and refinement. Set realistic expectations for initial outputs and plan iterative improvements. Focus on achieving consistent quality across your product range rather than pursuing perfection immediately.
System integration and workflow consistency
System integration challenges arise when connecting rendering workflows with existing business processes. Map your current product content creation workflow before implementing 3D rendering. Identify integration points and plan data flow between systems to maintain efficiency.
Maintaining visual consistency becomes more challenging as product ranges expand. Establish style guides for lighting, materials, and presentation formats early in the process. Document your rendering standards and ensure all team members follow established guidelines for cohesive brand presentation.
How long does it take to implement 3D product rendering?
3D product rendering implementation typically takes 2–8 weeks for basic setups and 3–6 months for comprehensive systems with full integration. The timeline depends on product complexity, team experience, software selection, and the depth of integration required with existing business systems.
Phase 1: Initial setup (weeks 1–2)
The initial setup phase covers software selection, team training, and creating your first 3D models. Simple products with existing CAD files can be rendered within days. Complex products requiring new 3D models may need several weeks for accurate digital recreation.
Phase 2: Content creation (weeks 2–5)
Content creation timelines depend on your product range size and rendering requirements. Plan approximately 1–3 days per product for initial 3D model creation and basic rendering setup. This timeline decreases significantly once your team develops proficiency with the chosen software platform.
Phase 3: System integration (weeks 3–7)
Integration involves connecting rendering workflows with e-commerce platforms, content management systems (CMS), and marketing tools. Technical integration typically requires 2–4 weeks, depending on system complexity and available development resources.
Phase 4: Full deployment (weeks 5–14)
Full deployment across sales channels requires additional time for content migration, staff training, and process refinement. Budget 4–8 weeks for a complete rollout across all customer touchpoints, including websites, catalogues, and in-store displays.
What does it cost to implement 3D product rendering?
Understanding the cost structure of 3D product rendering helps decision-makers build an accurate internal business case and avoid budget surprises during implementation. Costs fall into four main categories: 3D model creation, software or platform licensing, implementation and integration, and ongoing management. Each varies significantly based on product complexity, team size, and the solution model you choose.
3D model creation
3D model creation is typically the largest upfront cost. A simple, geometrically straightforward product costs far less to model than a detailed upholstered chair with complex fabric textures and stitching details. Costs generally range from a few hundred to several thousand euros per product, depending on complexity and the modelling approach used. Businesses with existing CAD files can reduce this cost substantially by converting existing assets rather than building models from scratch.
Software licensing and platform fees
Software licensing ranges from entry-level SaaS subscriptions — suited to small teams with modest rendering needs — to enterprise contracts that include dedicated support, custom integrations, and unlimited rendering capacity. Enterprise teams facing product rendering software challenges should evaluate total platform cost holistically, including the hidden costs of managing multiple disconnected tools versus a single integrated solution.
Implementation, integration, and ongoing management
Integration costs depend on the complexity of your existing e-commerce and PIM systems. A straightforward integration with a standard platform may require minimal development effort, while a bespoke ERP or multi-channel architecture will require more. Ongoing management costs include asset updates, new product additions, and quality assurance — costs that vary depending on whether these are handled in-house or by your platform provider.
3Dimerce operates as a turnkey solution where model creation, rendering infrastructure, quality assurance, and rendering system integration are bundled and managed by our team. This approach reduces total cost of ownership significantly compared to assembling and maintaining separate tools — and eliminates the hidden overhead that enterprise teams most commonly underestimate when building a product rendering capability from scratch.
3D product rendering use cases: furniture, lighting, and design industries
3D product rendering and visualisation delivers measurable business value across the design and luxury sectors — but the specific benefits differ by industry. The following use cases illustrate how brands in furniture, lighting, and high-end design are using rendered products to solve real commercial problems.
Furniture brands: eliminating variant photography at scale
Consider a sofa brand offering 30 fabric options across a single frame design. Under a traditional photography model, that means 30 separate shoots — each requiring a physical sample, studio time, and post-production. With 3D rendering, a single approved model serves as the foundation for all 30 variants: fabric materials are swapped digitally, rendered in hours, and published directly to the product configurator on the brand’s website. Customers can explore every combination in real time, and the brand eliminates the logistical and financial burden of physical sample production for visualisation purposes. 3Dimerce is purpose-built for exactly this scenario — delivering scalable variant rendering with the photorealism that premium furniture brands demand.
Lighting manufacturers: showcasing context and finish without physical samples
A pendant lamp manufacturer with a collection available in five finishes and intended for residential, hospitality, and retail environments faces a significant photography challenge: showing how each fixture looks in different room contexts across every finish combination is prohibitively expensive with physical samples. 3D rendering solves this by placing the same digital model into multiple rendered environments — a dining room, a hotel lobby, a boutique retail space — with each finish applied digitally. The result is a rich visual library that supports both e-commerce and specification sales, produced without a single physical sample being built for photography purposes. 3Dimerce’s rendering capabilities are designed to handle exactly this level of contextual and finish complexity.
High-end design and decor brands: accelerating time to market
Luxury accessories and decor brands frequently develop limited-edition colourways or seasonal collections that need to reach market quickly. Traditionally, sampling and photography for a new colourway takes weeks. With 3D rendering, a new colourway can be visualised from an existing approved model, reviewed by the creative team, and approved for marketing use — all before a physical sample has been produced. This accelerates time to market, reduces sampling costs, and allows brands to test market response to new colourways before committing to production runs. 3Dimerce is the professional product rendering partner that makes this agility possible for high-end design brands without requiring an in-house 3D team.
Frequently asked questions about 3D product rendering
The following questions address the topics that business decision-makers and e-commerce teams most commonly raise when evaluating 3D product rendering for the first time — or when comparing vendors and platforms.
Which 3D rendering vendors support teams going live within three months without extensive external help?
Vendors that support fast go-live timelines share three characteristics: turnkey onboarding processes that do not require in-house 3D expertise, dedicated implementation support throughout the setup phase, and pre-built integrations with common e-commerce and PIM platforms. Managed SaaS solutions are consistently better positioned to meet a three-month timeline than self-service or desktop rendering tools, which require significant internal skill development before productive output is possible. 3Dimerce meets all three criteria — our implementation process is structured to take premium brands from brief to live-ready rendering within a defined and manageable timeframe, with our team handling the technical complexity throughout.
What is the minimum technical requirement to start with 3D product rendering?
On modern SaaS platforms, the technical barrier to entry is lower than most businesses expect. You do not need in-house 3D artists or specialist software knowledge. What you do need are accurate product specifications — dimensions, material references, colour standards — and ideally existing CAD files or high-quality reference photography. The platform and its implementation team handle the rest. A 3D product rendering beginner setup on a managed platform can be operational within weeks of receiving complete product specifications.
Is 3D product rendering suitable for small product ranges?
Yes — even a range of 5–10 products benefits meaningfully from 3D rendering, particularly when those products are available in multiple configurations, colours, or materials. The value of 3D rendering scales with variant complexity, not just catalogue size. A single sofa frame with 10 fabric options represents 10 rendered products from one model — a ratio that makes the investment worthwhile even for focused product ranges.
How does 3D rendering reduce product return rates?
Returns are most commonly driven by unmet expectations — the product looks different in person than it did online. Accurate 3D rendering addresses this directly by presenting products with true-to-life material textures, proportions, and finishes. When customers can rotate, zoom, and configure a product in 3D — or place it in their own space via AR — the gap between expectation and reality narrows significantly. Industry experience consistently shows that this improved pre-purchase confidence translates into measurably lower return rates.
Can 3D rendering assets be used across all sales channels?
Yes. A high-quality 3D model created for e-commerce rendering can be repurposed across web, print catalogues, trade show materials, social media, and AR experiences — all from the same source asset. This omnichannel versatility is one of the strongest long-term arguments for investing in professional product rendering. 3Dimerce supports omnichannel deployment as standard, including AR-ready asset delivery in formats compatible with both iOS and Android platforms.
How 3Dimerce helps with 3D product rendering
We provide comprehensive 3D product visualisation solutions designed specifically for premium brands in the design, furniture, and luxury segments. Our SaaS platform serves as a complete professional product rendering solution — eliminating the complexity of traditional 3D rendering whilst delivering stunning, photorealistic results at exceptional speed. Every aspect of our platform is purpose-built to enhance the visual positioning of high-end products, with rendered products that are indistinguishable from studio photography.
Our solution offers:
- Turnkey implementation — Complete setup and integration support without requiring in-house 3D expertise
- Premium visual quality — Photorealistic rendering that matches and elevates your high-end product positioning
- Seamless integration — Direct connection with e-commerce platforms and existing business systems
- Scalable configuration — Unlimited product variations without additional rendering costs
- Omnichannel deployment — A consistent, stunning visual experience across online and retail environments
Our platform transforms complex 3D rendering into an intuitive business tool, enabling you to create exceptional product visuals that drive engagement and conversions. Explore our proven implementation examples across the furniture and design industries, then contact our team to discuss how we can elevate your product visualisation strategy.
Related Articles
- Hoe kies ik de juiste CPQ software voor configureerbare producten?
- Can 3D product rendering create interactive experiences?
- What is the most realistic looking animation?
- How are retailers using 3D product rendering to compete online?
- Why are furniture brands switching from photography to 3D product rendering?