
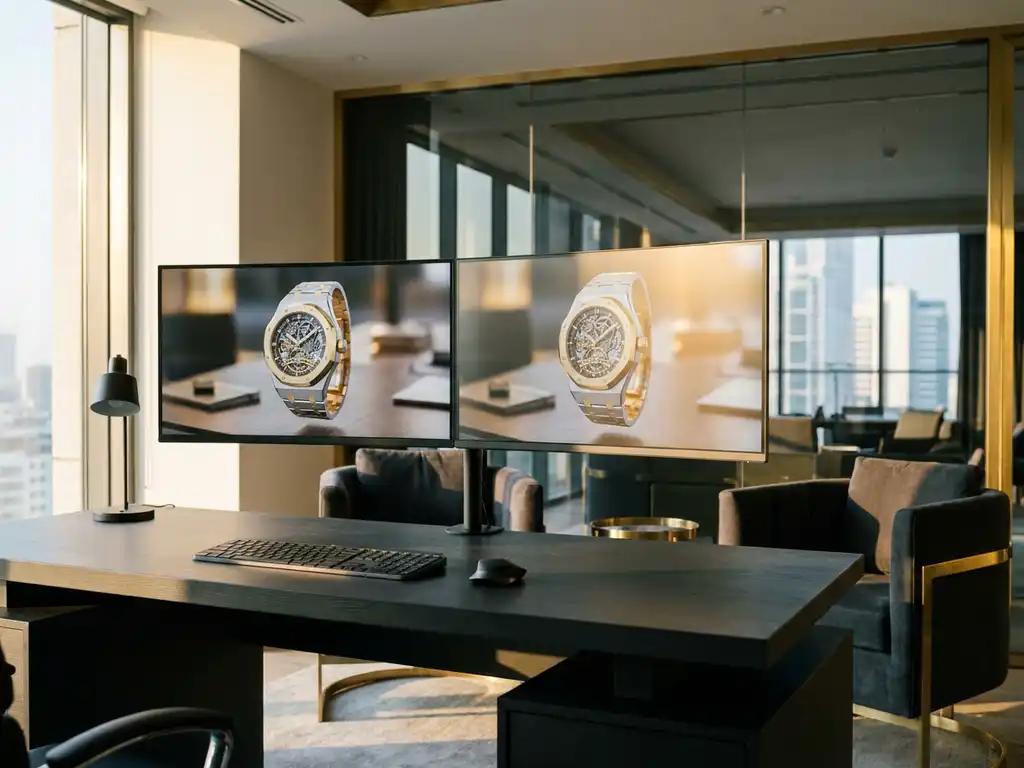
Photorealistic rendering transforms digital 3D models into images so convincing they are indistinguishable from photographs. The best rendering software combines advanced algorithms, sophisticated lighting models, and material physics to produce high-fidelity visual output. Leading rendering engines include Arnold, V-Ray, Octane Render, and Cycles, each excelling in different scenarios — from architectural visualization to product marketing and e-commerce.
Why are subpar renders costing you more than you think?
Poor quality renders don’t just look unprofessional — they actively damage brand credibility and sales conversion. When potential customers see flat, unrealistic product images, they immediately question the quality of the actual products. Research consistently shows that high-quality visuals increase purchase intent, while mediocre renders reduce conversion rates and force reliance on expensive physical samples and photoshoots. The solution lies in investing in professional-grade rendering software that delivers consistent, photorealistic results across an entire product range.
How is outdated rendering technology holding back your competitive edge?
Using legacy rendering tools or basic visualization software puts studios and brands at a measurable disadvantage against competitors who have embraced modern photorealistic rendering. Slow render times mean missed deadlines, limited iteration cycles, and an inability to respond quickly to market demands. Meanwhile, competitors are launching products faster, customizing visuals at scale, and creating immersive experiences that drive sales. The fix requires transitioning to real-time rendering engines or cloud-based solutions that deliver professional results without the traditional time penalties.
Visual Commerce Solutions
Talk to our team about your project.
What makes rendering software photorealistic?
Photorealistic rendering software achieves realism through several critical components working in harmony. Advanced lighting algorithms simulate how light behaves in the real world, including global illumination, caustics, and subsurface scattering. Material shaders accurately represent surface properties like roughness, reflectivity, and transparency. High-quality geometry and detailed textures provide the foundation, while sophisticated camera models replicate real lens characteristics, including depth of field and chromatic aberration.
The most realistic renders also incorporate physical accuracy in their calculations. This means following the laws of physics for light transport, energy conservation in materials, and accurate color reproduction. Modern rendering engines use path tracing or similar techniques to simulate millions of light rays, creating natural shadows, reflections, and atmospheric effects that viewers expect to see in photographs.
Path tracing
Path tracing simulates the physical journey of individual light rays from the camera back to their light source, calculating how each ray interacts with surfaces, bounces through space, and ultimately contributes to the final pixel color. This approach produces accurate soft shadows, realistic indirect illumination, and natural color bleeding between surfaces. Arnold, Cycles, and Octane Render all use path tracing as their core algorithm, making them among the most capable photorealistic rendering engines available.
Global illumination
Global illumination (GI) accounts for the way light bounces between surfaces in a scene rather than treating each surface in isolation. When light strikes a red wall, it carries a subtle red tint as it reflects onto adjacent surfaces — an effect that makes renders feel spatially coherent and believable. Without GI, scenes appear flat and artificially lit regardless of how detailed the geometry or textures are.
Subsurface scattering
Subsurface scattering (SSS) describes how light penetrates translucent materials — skin, wax, marble, fabric — scatters beneath the surface, and exits at a different point. This effect is what gives human skin its warmth and depth, and what makes a candle glow from within. Rendering engines that handle SSS accurately are essential for organic materials and luxury product categories such as cosmetics, jewelry, and soft furnishings.
Caustics
Caustics are the focused patterns of light that form when rays pass through or reflect off curved transparent or specular surfaces — the bright ripples on the bottom of a swimming pool, or the concentrated highlight beneath a crystal glass. Rendering caustics accurately requires dedicated algorithms and significantly increases computation time, but the result is a level of optical realism that distinguishes professional renders from amateur work.
AI denoising
AI denoising uses machine-learning models — such as NVIDIA OptiX or Intel Open Image Denoise — to remove the grain that appears in path-traced renders at low sample counts. Instead of running thousands of additional samples to achieve a clean image, the denoiser reconstructs a clean result from far fewer samples, dramatically cutting render times without sacrificing perceptible quality. Most leading photorealistic rendering engines now ship with integrated AI denoising as a standard feature.
What is Physically Based Rendering (PBR) and why does it matter?
Physically Based Rendering (PBR) is the industry-standard framework that underpins all modern photorealistic rendering engines. It replaced older shading models — such as Phong and Blinn-Phong — that approximated the appearance of surfaces without following the actual physics of light. PBR enforces energy conservation (a surface cannot reflect more light than it receives), uses real-world measured material properties, and produces consistent, predictable results under any lighting condition. The shift to PBR is why renders created today look fundamentally more convincing than those produced a decade ago.
Every PBR material is defined by a set of properties that map directly to physical surface characteristics. Understanding these properties is the foundation of creating materials that read as real:
- Base Color: The inherent color of the surface, independent of lighting. For metals, this defines the tint of reflections; for non-metals, it defines the diffuse albedo.
- Roughness: Controls how microscopically uneven the surface is. A value of 0 produces a perfectly mirror-like reflection; a value of 1 produces a fully diffuse, matte surface. Real-world surfaces almost always fall somewhere between these extremes.
- Metalness: Defines whether a surface behaves as a conductor (metal) or a dielectric (non-metal). Metals reflect light in a tinted, specular manner; non-metals reflect a small, untinted specular highlight while scattering most light diffusely.
- Normal Map: Encodes microscopic surface detail — scratches, pores, weave patterns — without adding geometry, allowing the renderer to simulate complex surface topology at near-zero performance cost.
- Ambient Occlusion: Approximates the soft shadowing that occurs in crevices and contact areas where light has limited access, adding depth and grounding to the scene.
It is also worth distinguishing between photorealistic and ultra-realistic rendering. Photorealistic means the output is indistinguishable from a photograph under normal viewing conditions — the standard benchmark for commercial product imagery. Ultra-realistic rendering goes further, simulating the physical behavior of a camera sensor itself: lens flare, chromatic aberration, motion blur, film grain, and vignetting. This level of detail is typically reserved for cinematic work where the render must match footage captured by a specific camera and lens combination. For most product and e-commerce applications, PBR-based photorealistic rendering delivers everything required to build customer trust and drive purchase decisions.
Which rendering engines produce the most photorealistic results?
Several rendering engines stand out for photorealistic output in 2026. The right choice depends on the use case — whether that is film production, architectural visualization, product e-commerce, or real-time interactive experiences. The table below provides a fast-reference comparison of the leading photorealistic rendering engines across the dimensions that matter most for production decisions.
| Engine | Render Method | Best Use Case | Photorealism Level | Approx. Annual Cost | Free Tier |
|---|---|---|---|---|---|
| Arnold | CPU / GPU | Film VFX, high-end product visualization | Exceptional | ~$360/year | No |
| V-Ray | CPU / GPU / Hybrid | Architecture, interior design, automotive | Exceptional | ~$470–$790/year | No |
| Octane Render | GPU | Fashion, jewelry, GPU-intensive product rendering | Exceptional | ~$240/year | No |
| Cycles (Blender) | CPU / GPU | Independent studios, game assets, product visualization | High | Free | Yes |
| Unreal Engine 5 | GPU (Real-Time) | Interactive configurators, automotive showrooms, e-commerce | Very High | Free (royalty model) | Yes |
| NVIDIA Omniverse | GPU (Real-Time / Offline) | Collaborative 3D pipelines, digital twins | Very High | Free (base tier) | Yes |
Comparison of leading photorealistic rendering engines in 2026. Pricing reflects standard single-user licenses where applicable.
Offline rendering engines
- Arnold: The industry standard for film and high-end visualization, offering uncompromising quality through robust path tracing algorithms.
- V-Ray: Excels in architectural visualization and product rendering, with extensive material libraries and versatile lighting tools. Annual licensing ranges from approximately $470–$790 depending on the host application.
- Octane Render: Specializes in GPU-accelerated rendering with an exceptional balance of speed and quality. Subscriptions start at around $20 per month.
- Cycles (Blender): A free, open-source path tracer integrated into Blender, providing professional results accessible to smaller studios and independent artists.
Real-time rendering engines
- Unreal Engine 5 (Lumen): Delivers impressive photorealistic results in real time using dynamic global illumination, temporal upsampling, and AI-enhanced denoising.
- NVIDIA Omniverse: Combines real-time and offline rendering capabilities within a collaborative 3D development platform.
For product configuration and sales applications, real-time rendering engines often provide the best balance — allowing customers to see changes instantly while maintaining convincing visual quality. You can explore various use cases where real-time photorealistic rendering transforms customer experiences.
Which rendering engine is right for your industry?
Matching the right engine to your industry is as important as matching it to your budget. Each of the leading photorealistic rendering engines has a natural home in specific production contexts:
- Arnold — Film VFX studios and high-end product photography pipelines. Arnold’s unbiased path tracing and deep integration with Maya and Houdini make it the default choice wherever absolute quality and pipeline compatibility are non-negotiable.
- V-Ray — Architecture, interior design, and automotive visualization. V-Ray’s physically accurate sky systems, IES light support, and deep integration with 3ds Max, SketchUp, and Rhino make it the dominant engine in these sectors.
- Octane Render — Fashion, jewelry, cosmetics, and any product category requiring fast GPU-accelerated iteration. Octane’s spectral rendering and speed make it particularly effective for materials with complex optical behavior, such as gemstones and metallic finishes.
- Cycles / Blender — Independent studios, game asset pipelines, and budget-conscious product visualization teams. Cycles delivers professional path-traced results at no licensing cost, making it the go-to for smaller operations building rendering capability before committing to commercial software.
- Unreal Engine — Interactive e-commerce configurators, automotive showrooms, and real-time brand experiences. Lumen’s dynamic GI enables photorealistic interactivity that no offline engine can match for live customer engagement.
For luxury product brands and e-commerce businesses, choosing a single engine is often not the most efficient path. Real-time configurator platforms like 3Dimerce eliminate that decision entirely — delivering photorealistic output optimized for conversion at scale, regardless of the underlying render pipeline.
How do real-time and offline rendering differ for realistic output?
Real-time and offline rendering are two distinct approaches to photorealistic output, each with different trade-offs between quality and speed.
Offline rendering prioritizes absolute quality, using complex algorithms — such as full path tracing with unlimited light bounces — that can take hours or days to calculate a single frame. This approach allows for precise material calculations and maximum detail resolution. It is the standard for final marketing images, architectural presentations, and film work where quality takes priority over speed.
Real-time rendering delivers results in milliseconds by using approximations and hardware-accelerated optimizations. Modern real-time engines like Unreal Engine 5 achieve remarkable realism through techniques like Lumen global illumination, screen-space reflections, and AI-enhanced denoising. While not always matching offline quality at the pixel level, real-time rendering enables interactive product configuration, live customization, and rapid iteration — capabilities that are increasingly critical for e-commerce and in-store retail experiences.
Still renders, animations, or interactive configurators: which format fits your goal?
Choosing the right rendering format is as important as choosing the right engine. The output format determines production complexity, interactivity, and ultimately how effectively the visual content serves its commercial purpose.
Static photorealistic product images offer the highest quality ceiling of any format and remain the standard for e-commerce listings, print campaigns, and social media. A single high-sample offline render can achieve a level of material and lighting fidelity that no other format currently matches. The trade-off is that each image is fixed — changing a color, material, or configuration requires a new render pass, which limits scalability for brands with large product catalogs.
Animated walkthroughs and turntables add a storytelling dimension that static images cannot provide. A 360-degree product turntable communicates form, proportion, and material behavior across multiple angles simultaneously, making it highly effective for trade show presentations, video campaigns, and product launch content. The production cost is higher — animation requires rendering every frame of the sequence — but the engagement value is significantly greater than a single static image.
Interactive real-time 3D configurators represent the commercial frontier of photorealistic visualization. Customers interact directly with a photorealistic product model, changing materials, colors, and components in real time with zero additional render time per variant. The sales impact is direct: interactive configuration reduces purchase hesitation, increases average order value, and dramatically cuts return rates by ensuring customers understand exactly what they are buying. For luxury and design brands selling online, this format combines the visual quality of offline rendering with the speed and scalability of real-time engines — making it the optimal choice for brands that compete on both aesthetics and customer experience. Our platform at 3Dimerce is built precisely to deliver this capability at the standard luxury brands demand.
How to create a photorealistic render: a step-by-step workflow
Understanding which engine to use is only half the challenge — the workflow you follow determines whether that engine produces a convincing result or a technically competent but visually flat image. The following steps apply across all major photorealistic rendering engines and represent the production process used in professional studios.
Step 1: Define your scene and output goal
Before opening your rendering software, establish what the final output needs to be — a still image, an animated sequence, or an interactive real-time experience. This decision determines your engine choice, lighting approach, and acceptable render time. A still product image for e-commerce has different quality requirements and constraints than a real-time configurator for a luxury brand showroom.
Step 2: Build or import geometry with clean topology
Photorealistic renders depend on geometry that accurately represents the physical product. Import or model your object with clean, well-structured topology — avoiding unnecessary polygon density in flat areas while maintaining sufficient detail at curved edges and surface transitions. Poor geometry is one of the most common sources of artifacts that break photorealism, particularly in reflective materials where surface normals are visible in highlights.
Step 3: Set up a physically accurate lighting environment
Use an HDRI (High Dynamic Range Image) environment map as your base illumination source — this provides realistic ambient light, natural reflections, and color temperature that matches real-world conditions. Add area lights for your key, fill, and rim lights to control the primary light direction and shadow quality. Match the color temperature of all light sources: mixing warm and cool temperatures without intent is one of the fastest ways to make a render look artificial.
Step 4: Apply PBR materials with correct roughness and metalness values
Assign PBR materials to every surface in the scene, paying close attention to roughness values. Polished metals typically sit between 0.05 and 0.15 roughness; brushed metals between 0.3 and 0.5; matte plastics between 0.6 and 0.9. Add micro-imperfections — subtle scratches, fingerprints, and surface variation — using normal maps and roughness variation maps. These imperfections are what make photorealistic renders feel tactile rather than synthetic.
Step 5: Configure camera settings
Set your camera to mimic a real-world lens: choose a focal length appropriate to your subject (85–135mm is standard for product photography), enable depth of field with an aperture value that matches the desired focus range, and position the camera at an angle that communicates the product’s key design features. Avoid extreme wide-angle focal lengths for product renders — they introduce perspective distortion that reads as artificial even when technically correct.
Step 6: Run a low-sample test render
Before committing to a full-quality render, run a fast low-sample pass to evaluate lighting, composition, and material behavior. This step saves significant time — catching a misaligned light or an incorrect material value at test-render stage takes seconds to fix, whereas discovering the same issue after a multi-hour final render wastes an entire production cycle.
Step 7: Optimize noise reduction
If the test render shows acceptable composition and lighting, address any noise in the image before running the final pass. Increase sample counts in areas of high variance — caustics, volumetrics, and complex reflections — or enable AI denoising (NVIDIA OptiX, Intel Open Image Denoise) to clean the image at lower sample counts. The right balance between samples and denoising depends on your engine and scene complexity, but AI denoising typically delivers clean results at 20–30% of the sample count required without it.
Step 8: Final high-sample render or real-time export
Run your final render pass at production quality settings, or export your real-time scene for interactive deployment. For offline renders, use render passes (beauty, diffuse, specular, shadow, ambient occlusion) rather than a single flattened output — this enables non-destructive post-processing without requiring a re-render for every adjustment.
Step 9: Post-process for color grading and subtle imperfections
Import your render passes into a compositing application and apply color grading to match your brand’s visual identity. Add subtle post-processing effects — very slight vignetting, minimal chromatic aberration, and careful sharpening — to give the image the visual signature of a real photograph. Avoid over-processing: the goal of post-production in photorealistic rendering is to enhance, not to compensate for deficiencies in the render itself.
What hardware do you need for photorealistic rendering?
Photorealistic rendering demands significant computational power. Hardware requirements vary based on the chosen rendering engine — CPU-based or GPU-based — and the complexity of the scenes being rendered.
CPU rendering
Rendering engines like Arnold and V-Ray CPU rely on multi-core processors to run path tracing calculations in parallel. High-core-count CPUs such as the AMD Threadripper or Intel Xeon series are the standard choice for production environments running these workloads.
GPU rendering
GPU-accelerated rendering — used by Octane Render, Cycles, and V-Ray GPU — offers significant speed advantages over CPU rendering for many scene types. NVIDIA RTX 4090 or professional RTX 6000 Ada cards provide strong performance. Multiple GPUs in a single workstation can dramatically reduce render times, making them cost-effective for high-volume production.
Memory and storage
Professional rendering scenes require a minimum of 32GB of system RAM, with 64GB or more recommended for complex, asset-heavy projects. Fast NVMe solid-state storage ensures quick asset loading and efficient scene management. For real-time rendering workflows, a modern GPU such as the RTX 4080 or better provides smooth interactive performance at high visual quality.
How much does professional rendering software cost?
Professional photorealistic rendering software is available across a range of pricing models, from per-seat annual licenses to usage-based cloud rendering.
- Arnold: Approximately $360 per year per license.
- V-Ray: Approximately $470–$790 per year, depending on the host application (3ds Max, Maya, SketchUp, etc.).
- Octane Render: Subscription plans starting at approximately $20 per month for individual licenses, scaling to $50+ for studio versions.
- Cloud rendering services: Charged per compute hour rather than as a software license — often more cost-effective for studios with variable or seasonal workloads.
- Enterprise licensing: Most vendors offer volume discounts, render farm management tools, and extended material libraries for larger teams.
When evaluating total cost of ownership, factor in hardware, training, and ongoing maintenance alongside the software license. Many studios find that investing in higher-end rendering software pays for itself through improved production efficiency and stronger client outcomes.
What are the best free alternatives for realistic rendering?
Several free and open-source rendering tools deliver professional photorealistic results without licensing costs, making them viable starting points for independent artists, students, and smaller studios.
- Blender Cycles: The most capable free rendering solution available. Cycles is a full path tracer supporting volumetrics, subsurface scattering, and a comprehensive node-based material system. Actively maintained with regular feature updates.
- LuxCoreRender: An unbiased, physically based rendering engine with accurate light transport simulation. Requires more technical setup than Cycles but delivers results comparable to commercial offline renderers.
- Appleseed: An open-source renderer focused on physically accurate output for film and animation pipelines.
- Unreal Engine: Free to use for most applications, with access to its Lumen real-time global illumination system. Primarily designed for interactive and game development pipelines, but widely used for architectural visualization and product rendering.
Free rendering tools require more setup time and technical knowledge than commercial alternatives. However, many professionals use them to learn core rendering principles — lighting, materials, and camera physics — before investing in commercial software. Mastery of these fundamentals transfers directly to any rendering engine.
The future of photorealistic rendering: AI, real-time, and beyond
Artificial intelligence is reshaping every stage of the photorealistic rendering pipeline. AI denoising has already become standard across all major rendering engines, but the next wave goes further: AI-upscaling technologies such as NVIDIA DLSS and AMD FSR allow real-time engines to render at lower internal resolutions and reconstruct sharp, high-fidelity output at near-zero performance cost. Emerging generative AI tools are beginning to automate scene lighting, material generation, and even background composition — reducing the technical skill barrier to photorealism and allowing artists to focus on creative direction rather than technical configuration.
The boundary between real-time and offline rendering quality is collapsing. Unreal Engine 5’s Lumen global illumination system and NVIDIA Omniverse’s real-time path tracing capabilities are delivering results that, just three years ago, would have required hours of offline computation. For e-commerce and product visualization, this convergence is transformative: brands can now offer customers genuinely photorealistic interactive experiences — not approximations — directly within a web browser or retail environment. The technical gap that once forced a choice between quality and interactivity is effectively closing.
The commercial frontier of photorealistic rendering is the digital twin and the interactive 3D product configurator. Rather than presenting customers with a static image or a pre-rendered video, brands can place a fully photorealistic, interactive model of their product in the customer’s hands — configurable in real time, viewable from any angle, and indistinguishable from a physical object under studio lighting. Industry experience shows that this level of visual engagement directly reduces purchase hesitation and return rates, particularly in high-consideration product categories such as furniture, fashion, automotive accessories, and luxury goods.
We at 3Dimerce are already operating at this frontier. Our platform delivers real-time photorealistic configuration for luxury and design brands, combining the visual quality that offline rendering engines have historically monopolized with the speed, scalability, and interactivity that modern e-commerce demands. As AI rendering tools continue to mature and real-time quality continues to rise, our platform evolves with them — ensuring that the brands we work with are always presenting their products at the highest standard the technology allows.
Pro tips for achieving better photorealistic renders
Technical knowledge of rendering engines and PBR workflows is necessary, but the difference between a render that looks good and one that is genuinely mistaken for a photograph often comes down to a set of professional habits applied consistently across every project.
- Study reference photography before building your scene. Identify where shadows fall, how reflections behave, and what color temperature the primary light source uses in professional photographs of your product category. Matching these real-world cues is the fastest path to photorealism and costs nothing beyond observation time.
- Use HDRI lighting as your base illumination source. A high-quality HDRI environment map provides realistic ambient light, natural color temperature, and accurate reflections that area lights alone cannot replicate. Even a simple product on a white surface benefits dramatically from a well-chosen HDRI as the foundation of the lighting setup.
- Match color temperature across all light sources. Mixing warm and cool light sources without deliberate intent is one of the most common causes of renders that feel visually inconsistent. Decide on a dominant color temperature — daylight (5500–6500K) or studio tungsten (3200K) — and keep all lights within a coherent range unless you are deliberately creating a mixed-light effect.
- Add micro-imperfections to every material. Real surfaces accumulate fingerprints, micro-scratches, dust, and surface variation over time. Adding subtle roughness variation maps and normal map details — even to ostensibly pristine products — is what separates renders that feel tactile from those that feel synthetic.
- Render multiple camera angles before committing to finals. Lighting and material behavior look different from different perspectives. Spending ten minutes evaluating four or five camera positions at draft quality is far more efficient than discovering a compositional problem after a multi-hour final render.
- Use render passes for non-destructive post-processing. Rendering separate passes for diffuse, specular, shadow, and ambient occlusion allows you to adjust the contribution of each element in post-production without re-rendering. This is standard practice in professional pipelines and dramatically reduces iteration time.
- Study how professional photographers light your product category. Product photography lighting for jewelry differs fundamentally from automotive photography or furniture staging. Understanding the conventions of your category — the standard light positions, the typical background treatment, the expected depth of field — gives your renders an immediate sense of contextual authenticity.
- Test your render at its intended display size. A render that looks convincing at full resolution may reveal artifacts, noise, or material issues when scaled to a web thumbnail or cropped for a social media format. Always evaluate your output at the size and context in which it will actually be seen.
At 3Dimerce, these principles are embedded into our platform by default. Clients receive professional-grade photorealistic results without manual configuration — our material libraries, lighting systems, and camera presets are built to these standards from the ground up.
Common mistakes that make renders look unrealistic (and how to fix them)
Even technically advanced renders can fail photorealism checks due to a handful of predictable errors. Knowing what makes a render look photorealistic also means knowing what breaks it — and the following mistakes appear consistently across all skill levels and rendering engines.
- Mistake 1: Perfect, zero-roughness reflections. A mirror-perfect reflection on every surface signals immediately that a render is synthetic. Real polished metals, lacquered surfaces, and glossy plastics all have microscopic surface variation that scatters reflections slightly. Fix this by adding a roughness map with subtle variation — even values between 0.03 and 0.15 for polished metals introduce enough imperfection to read as real.
- Mistake 2: Incorrect lighting color temperature. Mixing a warm key light with a neutral fill light and a cool rim light without intent creates an incoherent lighting environment that the eye immediately reads as artificial. Establish a dominant color temperature for your scene and keep all light sources within a consistent range unless a mixed-temperature effect is the deliberate creative choice.
- Mistake 3: Missing surface imperfections and wear. Products in the real world carry fingerprints, micro-scratches, slight surface variations, and manufacturing marks. Renders that omit these details look pristine in a way that real objects never do. Adding subtle imperfection layers — even on brand-new products — is one of the highest-impact changes available for improving perceived photorealism.
- Mistake 4: Poor camera composition and framing. A technically excellent render can fail commercially if the camera angle does not communicate the product’s key design features. Study how professional product photographers frame similar objects — the typical focal length, the distance from the subject, the angle relative to the dominant surface — and replicate those conventions in your render camera setup.
- Mistake 5: Ignoring environmental context and background. A product floating in a featureless white void reads as a render, not a photograph. Even a minimal environment — a surface, a subtle reflection, a background gradient — grounds the product in physical space and significantly increases perceived realism.
- Mistake 6: Undersampling causing visible noise. Noise in a final render is an immediate signal that the image is computer-generated. Increase sample counts in high-variance areas — caustics, volumetrics, complex reflections — or enable AI denoising to achieve a clean result at lower sample counts. Never deliver a noisy render as a final output regardless of time pressure.
- Mistake 7: Flat materials lacking subsurface response. Organic materials — skin, fabric, food, plant matter — transmit light through their surface rather than simply reflecting it. Applying a standard reflective shader to these materials produces a result that looks plasticky and unconvincing. Use subsurface scattering with appropriate scatter radius and color values to give organic surfaces their characteristic depth and warmth.
How photorealistic rendering drives sales, trust, and brand authority
Photorealistic rendering is not just a production technique — it is a sales and trust mechanism. When a customer sees a render they cannot distinguish from a photograph, purchase hesitation drops, return rates fall, and brand credibility rises. For luxury and design brands, the visual quality of your product imagery is as important as the product itself. Every image your brand publishes is a statement about the standard you hold yourself to — and customers in the high-end market read that signal immediately.
The commercial case for investing in professional photorealistic rendering extends well beyond aesthetics. Physical photoshoots are expensive, logistically complex, and inherently limited in scale — a single shoot produces a fixed set of images for a fixed set of configurations. Photorealistic rendering eliminates those constraints entirely, enabling brands to generate unlimited product variants, colorways, and configurations from a single 3D asset. The result is a visual content operation that scales with the product catalog rather than against it.
- Eliminate production delays: Our platform delivers professional-quality renders in real time, so your team can launch campaigns, respond to market trends, and iterate on designs without waiting days for render queues. Speed to market is a competitive advantage — and we are built to deliver it.
- Scale without limits: Generate unlimited product variants and configurations without additional photography costs or production delays. No physical photoshoot can match the scalability of a well-built 3D rendering pipeline — and ours is optimized specifically for brands with complex, configurable product ranges.
- Integrate seamlessly into your existing stack: Our solutions integrate directly into existing e-commerce platforms and in-store environments, fitting into your workflow rather than disrupting it. Photorealistic rendering capability should accelerate your operation, not add complexity to it.
- Meet the visual expectations of premium markets: Touchable textures, precise contours, and natural lighting effects crafted to meet the visual expectations of luxury and high-end markets. Our material libraries and lighting systems are built to the standard that design-led brands demand — not approximated, but engineered.
Ready to transform your product visualization with photorealistic rendering that converts browsers into buyers? Contact us today to discover how our platform can elevate your visual content strategy and accelerate your sales cycle. Whether you sell furniture, fashion, automotive accessories, or luxury goods, our platform is built to match your brand standard.
Frequently Asked Questions
How long does it typically take to learn photorealistic rendering software?
The learning curve varies significantly by software complexity and your background. Basic proficiency in user-friendly tools like Blender’s Cycles can be achieved in 2-3 months with consistent practice. Professional-level mastery of advanced software like Arnold or V-Ray typically requires 6-12 months of dedicated learning, including understanding lighting principles, material creation, and optimization techniques.
What's the biggest mistake beginners make when starting with photorealistic rendering?
The most common mistake is focusing on complex scenes before mastering lighting fundamentals. Many beginners jump into elaborate models with poor lighting setup, resulting in flat, unrealistic renders regardless of software quality. Start with simple objects and spend time understanding how light behaves—proper lighting can make a basic sphere look photorealistic, while poor lighting makes even detailed models look artificial.
Can I achieve photorealistic results on a limited budget?
Absolutely. Start with Blender (free) and invest in a mid-range GPU like RTX 4060 or better for decent rendering performance. Focus on learning proper lighting and material techniques rather than expensive software initially. Many professionals create stunning work using free tools—the key is understanding rendering principles, not just having expensive software.
How do I know if my renders are actually photorealistic or just look 'good'?
True photorealism passes the ‘uncanny valley’ test—viewers shouldn’t be able to distinguish it from a photograph at first glance. Key indicators include natural shadow falloff, realistic material interactions with light, proper color temperature consistency, and subtle imperfections that real objects have. If people ask whether it’s a photo or render, you’ve achieved photorealism.
Should I render everything at maximum quality settings?
Not necessarily. Match quality settings to your output requirements—social media posts don’t need the same quality as large-format prints. Higher quality settings exponentially increase render times without always providing noticeable improvements. Learn to optimize settings for each use case: draft quality for iterations, medium quality for client reviews, and maximum quality only for final deliverables.
What's the most efficient workflow for managing multiple product renders?
Establish a template-based system with standardized lighting setups, camera angles, and material libraries. Use batch rendering for multiple variants and implement a consistent file naming convention. Consider cloud rendering services for large batches to avoid tying up local workstations. Most importantly, create material and lighting presets that can be quickly applied across different products to maintain consistency while reducing setup time.
How do I troubleshoot renders that look almost right but something feels 'off'?
The ‘almost right’ feeling usually stems from subtle lighting or material issues. Check your color temperature consistency—mixed lighting temperatures create unnatural looks. Verify that materials have appropriate roughness values and that reflections aren’t too perfect. Often, adding subtle imperfections, dust, or fingerprints makes renders more believable. Compare your lighting setup to reference photographs of similar subjects to identify discrepancies.