
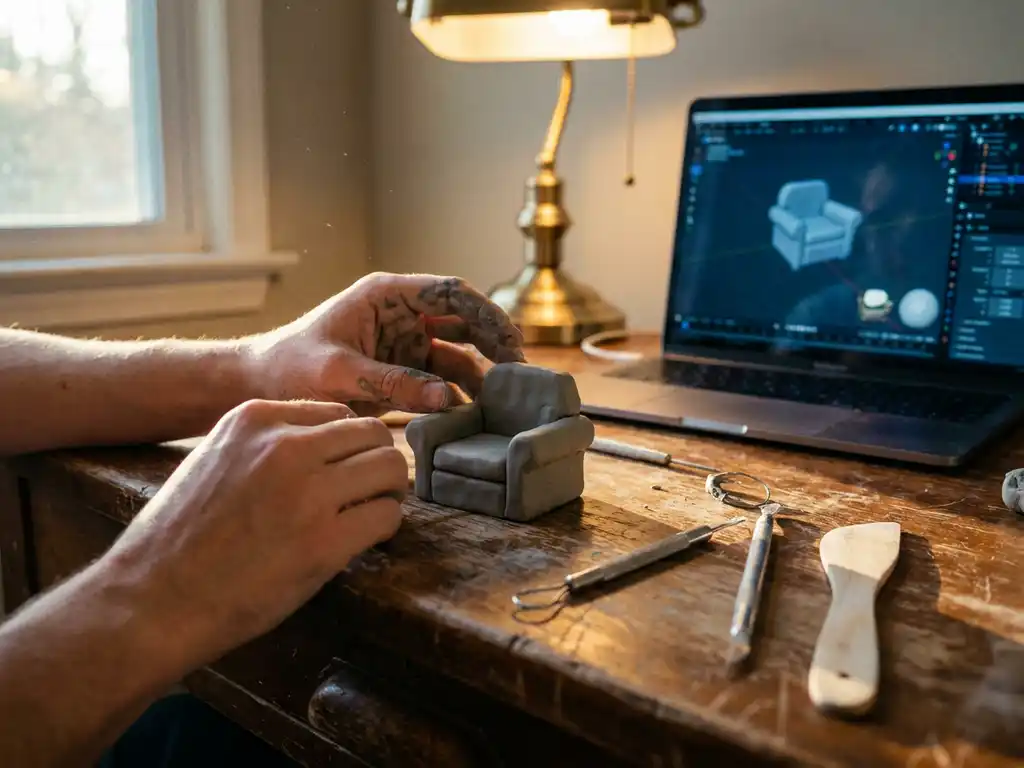
Yes, you absolutely can teach yourself 3D modeling. Whether your goal is artistic 3D modeling or technical CAD design, the self-teaching path is well within reach. With the right software, dedication, and a structured learning approach, many successful 3D artists are entirely self-taught. The combination of free tutorials, accessible 3D modeling software, and online communities makes independent learning more achievable than ever before.
Why starting without a roadmap costs you months of progress
Jumping into 3D modeling without a clear roadmap often leads to frustration and wasted time. Many beginners spend weeks learning complex features they don’t actually need, while missing fundamental concepts that form the foundation of good modeling. This scattered approach can stretch what should be a 3-6 month learning curve into over a year of inconsistent progress.
The solution is to start with a structured curriculum. Focus on mastering basic mesh manipulation, understanding topology, and completing simple projects before moving on to advanced techniques. Choose one software package and stick with it for at least your first few months rather than jumping between different programs.
How software choice paralysis slows down beginner 3D modelers
The abundance of 3D modeling software options often paralyzes beginners into endless research instead of actual practice. Spending weeks comparing Blender, Maya, and 3ds Max without touching any of them delays the hands-on experience that actually builds skills. This analysis paralysis prevents you from developing the muscle memory and spatial thinking that only comes through consistent practice.
Pick one beginner-friendly option and commit to it for your first project. Blender’s free access and extensive tutorial library make it an excellent starting point. The specific software matters less than consistent daily practice with whichever tool you choose.
Visual Commerce Solutions
Talk to our team about your project.
What is 3D modeling?
3D modeling is the process of creating three-dimensional digital representations of objects using specialized software. Artists and designers use mathematical coordinates and geometric shapes to build virtual objects that can be viewed from any angle, textured, lit, and rendered into photorealistic images.
Learning 3D modeling opens doors across multiple industries. Game developers create characters and environments, product designers visualize concepts before manufacturing, architects present building designs to clients, and marketing teams generate compelling product imagery without expensive photoshoots. The skill has become increasingly valuable as businesses embrace digital transformation and virtual experiences.
Beyond career opportunities, 3D modeling develops spatial reasoning, problem-solving abilities, and creative expression. The process of building complex objects from basic shapes trains your mind to break down complicated problems into manageable components.
From 3D modeling to animation: what comes next?
Once you have a solid foundation in 3D modeling, animation is a natural and achievable next step. The relationship between the two disciplines is straightforward: 3D modeling creates the assets — characters, props, environments — that animation then brings to life. Every animated film, game cutscene, or product video you have ever seen began with someone building models exactly like the ones you will learn to create.
Moving from modeling into animation requires a few additional skills beyond what you learn as a modeler. Rigging (creating a skeleton structure inside your model so it can move), keyframing (setting positions at specific points in time), and a basic understanding of motion principles such as easing and follow-through are the core building blocks. These concepts are learnable and well-documented, particularly within Blender’s ecosystem.
Blender supports the full pipeline from modeling to animation and rendering, making it an ideal choice for learners who want to eventually animate their models without switching software. Most self-taught artists who pursue 3D modeling and animation find that reaching a solid intermediate modeling level — roughly 6-12 months in — gives them the spatial and technical foundation needed to absorb animation concepts efficiently. If 3D modeling and animation is your ultimate goal, starting with modeling first is the right sequence.
What are the basic steps in 3D modeling? A beginner’s step-by-step guide
Knowing how to do 3D modeling starts with understanding the progression from an empty workspace to a finished, rendered model. The basic steps in 3D modeling below are designed to take an absolute beginner through their first complete project in a logical, frustration-free order.
Step 1: Choose and install your software
Download and install Blender — it is free, industry-respected, and has the largest beginner tutorial library available. Visit blender.org, download the latest stable release, and run the installer. Having your software ready before you begin any research keeps momentum on your side.Step 2: Learn the interface and basic navigation
Open Blender and spend your first session learning to navigate the 3D viewport. Use the middle mouse button to orbit, scroll to zoom, and Shift + middle mouse to pan. Familiarize yourself with the toolbar on the left and the properties panel on the right before touching any modeling tools.Step 3: Understand core concepts — vertices, edges, faces, and mesh
Every 3D model is made of three fundamental elements: vertices (points in space), edges (lines connecting two vertices), and faces (flat surfaces enclosed by edges). Together these form a mesh. Press Tab in Blender to toggle between Object Mode and Edit Mode, where you can select and manipulate these elements directly. Understanding this structure is the single most important conceptual step in learning how to 3D model.Step 4: Model your first primitive object
Start with a simple, recognizable object such as a mug or a basic chair. Add a cylinder primitive (Shift + A → Mesh → Cylinder), then use Extrude (E), Scale (S), and Loop Cut (Ctrl + R) to shape it into a mug body and handle. Working from a real-world reference image placed in the viewport will train your eye and keep proportions accurate.Step 5: Apply basic materials and textures
With your object selected, open the Material Properties panel and add a new material. Adjust the Base Color to give your model a surface appearance. For beginners, a simple flat color or a basic Principled BSDF shader with adjusted roughness and metallic values is enough to make a model look convincing in a render.Step 6: Set up lighting and render your first image
Switch to the Render Properties panel and select Cycles or EEVEE as your render engine. Add an area light (Shift + A → Light → Area) and position it above and to one side of your model to create natural-looking shadows. Press F12 to render your first image. Save the result — this is your baseline, and every model you render from here will be better than this one.Step 7: Save and export your file in the correct format
Save your Blender project file (.blend) with a clear, dated filename so you can track your progress over time. When exporting for use in other applications or for sharing, use File → Export and choose the appropriate format: .OBJ or .FBX for cross-software compatibility, .GLB for web and real-time use. Developing clean file-management habits from day one prevents confusion as your project library grows.
How long does it take to learn 3D modeling?
Learning 3D modeling is a progressive journey, and the timeline varies significantly depending on your goals, consistency, and the specialization you pursue. Rather than thinking in terms of a single endpoint, it helps to think in phases — each with its own skill targets, project types, and milestones. Consistency matters far more than total hours invested: daily 30-minute sessions typically outperform sporadic weekend marathons.
Phase 1: Beginner — Building your foundation (0–3 months)
In the first three months, your focus should be on understanding how 3D software works and completing your first recognizable models. By the end of this phase, you should be able to model and render a household object from reference.
- Navigate the 3D viewport confidently and use essential keyboard shortcuts
- Understand and manipulate vertices, edges, faces, and basic mesh topology
- Apply simple materials, set up basic lighting, and produce a clean render
- Complete 3-5 simple projects (mug, chair, simple building facade)
Milestone checkpoint: By month 3, you should be able to model a recognizable household object from a reference image, apply a basic material, and render a presentable result — entirely without following a tutorial.
Phase 2: Intermediate — Developing your workflow (3–12 months)
The intermediate phase is where learn 3D modeling starts to feel genuinely productive. You move from reproducing tutorials to solving your own modeling problems and building a body of work.
- Model more complex hard-surface objects (mechanical parts, furniture, simple vehicles)
- Understand UV unwrapping and apply image-based textures
- Develop efficient modeling habits: clean topology, logical naming, organized scenes
- Experiment with procedural materials and more advanced lighting setups
- Begin sharing work in online communities and incorporating feedback
Milestone checkpoint: By month 12, you should be able to produce a polished, portfolio-ready render of a complex object or scene within a reasonable working timeframe.
Phase 3: Advanced/Professional — Specializing and refining (1–3 years)
Professional-level expertise requires 2-3 years of dedicated practice, depending on your specialization and the complexity of projects you tackle. At this stage, you are no longer learning how to do 3D modeling in general — you are deepening mastery within a specific discipline.
- Develop speed and consistency across a range of project types
- Master specialization-specific tools (sculpting, rigging, procedural workflows, CAD parametrics)
- Build a portfolio that demonstrates range, technical quality, and a personal style
- Contribute to collaborative projects or take on freelance commissions
Milestone checkpoint: By year 2-3, you should be able to deliver client-ready assets or professional-grade visualizations with minimal revision cycles.
Which 3D modeling path fits your goals?
3D modeling is not a single discipline — it branches into distinct specializations that each require different software, skills, and ways of thinking. Choosing the right path early prevents wasted effort and helps you build a portfolio that is relevant to your target industry.
Game design and character art
Game artists create characters, creatures, props, and environments that must look great while staying within strict polygon and texture budgets. Blender is the most accessible starting point for this path, covering both hard-surface and organic modeling workflows. As skills advance, ZBrush becomes essential for high-detail character sculpting, with normal maps baked down to game-ready meshes. The learning curve is moderate, but the creative payoff — seeing your models move inside a game engine — is immediately motivating.
Product design and CAD
Product design and CAD modeling prioritize dimensional accuracy and parametric flexibility over artistic freeform. Fusion 360 is the most recommended tool for hobbyists asking whether they can learn professional 3D CAD software without formal training — its free personal license and approachable interface make it genuinely accessible. FreeCAD offers a fully open-source alternative for those who want to learn 3D modeling CAD beginners-style without any cost. This path rewards methodical thinkers who enjoy precise, measurement-driven workflows.
Architecture and building visualization
Architectural visualization requires an understanding of scale, spatial planning, and how light behaves inside and around built structures. SketchUp remains the most intuitive entry point for building design software, with its push-pull modeling approach feeling natural to anyone with a background in technical drawing. For more advanced work, Revit is the industry standard in professional architectural practice, though it carries a steeper learning curve and subscription cost. What’s required to learn 3D building design software beyond the tool itself includes a working knowledge of architectural conventions, scale, and how to read floor plans.
Animation and visual effects
3D modeling is the foundation for animation — you cannot animate what has not first been modeled. Blender supports the complete pipeline from modeling through rigging, animation, and rendering, making it the most cost-effective choice for learners pursuing 3D modeling and animation courses or self-study paths. Visual effects work at the professional level often introduces Houdini for procedural simulations, but most learners spend their first 1-2 years in Blender before branching out. The learning curve is longer than pure modeling, but the career opportunities in film, advertising, and interactive media are substantial.
What is the best 3D modeling software for beginners?
The best 3D modeling software for beginners depends on your goals, but Blender, Fusion 360, and SketchUp are the most recommended starting points. Each serves a different use case, and choosing the right one from the start prevents the need to switch programs mid-learning.
Blender
Blender stands out as the top all-around choice for beginners due to its free access, comprehensive feature set, and massive tutorial library. The software handles everything from basic modeling to advanced animation and rendering, eliminating the need to switch programs as your skills develop.
Fusion 360
Fusion 360 excels for product design and mechanical modeling, offering parametric modeling capabilities that make design iterations straightforward. As a CAD-based tool, Fusion 360 is particularly well-suited for hobbyists asking whether they can learn professional 3D CAD software without formal training. Its free personal license and integration with manufacturing workflows appeal to aspiring product designers.
SketchUp
SketchUp provides an intuitive entry point for architectural visualization, with its push-pull modeling approach feeling natural to newcomers. However, its limitations become apparent for complex organic modeling or character work.
Maya and 3ds Max
Maya and 3ds Max offer industry-standard capabilities but require significant financial investment and steeper learning curves. Consider these options only if you have specific professional requirements or educational access.
Industry-specific and advanced tools to know
As your skills develop and your career path becomes clearer, several additional tools become relevant to a complete professional workflow.
- ZBrush — Best for: organic character sculpting, film and game assets | Access: paid subscription | Learning curve: intermediate to advanced
- Substance Painter — Best for: professional texturing and material creation | Access: paid subscription (included in Adobe Creative Cloud) | Learning curve: intermediate
- Houdini — Best for: procedural VFX, simulations, and destruction effects | Access: free apprentice tier available | Learning curve: advanced
- FreeCAD — Best for: open-source CAD modeling and engineering workflows | Access: free | Learning curve: beginner to intermediate
- Revit — Best for: professional 3D building design software and architectural documentation | Access: paid subscription | Learning curve: intermediate to advanced
For beginners, the right starting point is almost always Blender. It is free, it covers the widest range of disciplines, and the skills you build in Blender transfer directly to other tools. As your goals sharpen — whether toward professional 3D CAD software, character art, or architectural visualization — expand your toolkit deliberately rather than all at once.
What skills do you need before starting 3D modeling?
You do not need formal art training or advanced math to start 3D modeling, but four foundational skills will meaningfully accelerate your progress.
- Spatial awareness: Understanding how objects relate to each other in three-dimensional space, and how 2D shapes combine to create 3D forms. Sketching from different angles or practicing technical drawing strengthens this ability.
- Basic computer literacy: Comfort with file management, keyboard shortcuts, and complex software interfaces. 3D programs typically feature dozens of tools and panels, so patience with new software workflows prevents early frustration.
- Geometry and proportions: A working understanding of how shapes, angles, and measurements relate improves your ability to create accurate and visually appealing models. Advanced calculation skills are not required. For those pursuing 3D building design software or CAD modeling, familiarity with technical drawing conventions and dimensional accuracy becomes especially valuable.
- Observational skills: Studying real-world objects — how light creates shadows, how surfaces connect, where details add visual interest — translates directly into better 3D modeling decisions.
How to practice 3D modeling effectively
Effective 3D modeling practice comes down to consistency, structure, and community. Knowing how to do 3D modeling at a technical level is only part of the equation — the learners who progress fastest are those who practice deliberately, seek feedback regularly, and set clear goals for every session.
- Start with simple objects. Model everyday items like mugs, chairs, or tools to build fundamental skills without overwhelming complexity. These projects teach essential techniques while producing recognizable results that maintain motivation. Resist the urge to jump into complex organic shapes or detailed environments before you have the basics locked in.
- Use the tutorial-then-recreate method. Follow structured tutorials initially, then recreate the same objects without guidance to test your understanding. This approach identifies knowledge gaps and builds confidence in independent problem-solving. Examining real-world applications of 3D modeling can inspire project ideas and demonstrate professional standards.
- Join a feedback community. Platforms like Reddit’s r/blender, Discord servers, and specialized forums provide supportive environments for asking questions and showcasing progress. Regular feedback helps identify areas for improvement and exposes you to different modeling approaches that you would not discover working in isolation.
- Build your portfolio from day one. Save and date every model you complete, even your earliest, roughest attempts. Tracking progress visually is one of the most powerful motivational tools available to self-taught learners, and an organized archive means your portfolio is always ready to grow. For businesses that need professional-grade product visuals without the portfolio-building timeline, we offer ready-made expertise.
- Set session-specific goals. Rather than “practice modeling,” aim to “complete the basic shape of a coffee mug” or “add realistic surface details to yesterday’s chair model.” This focused approach maintains momentum and provides clear progress indicators that keep you moving forward rather than circling the same techniques.
How to build a 3D modeling portfolio as a self-taught artist
A strong 3D modeling portfolio is the bridge between learning and professional opportunity, and the best time to start building it is earlier than you think. Even as a beginner, saving and dating your work creates a visual record of progress that is genuinely compelling to potential clients and employers — it demonstrates growth, consistency, and commitment.
For a beginner portfolio, aim for 3-5 diverse pieces that show range across different object types, materials, and lighting setups. Present each model with renders from multiple angles, include a wireframe shot to demonstrate clean topology, and consider a simple turntable animation to show the model in full three dimensions. Hosting options include ArtStation (the industry standard for 3D artists), Sketchfab (ideal for interactive 3D model sharing), or a personal website for full creative control. When reviewing a 3D modeling portfolio, clients and recruiters look for technical cleanliness, lighting quality, and evidence that the artist can work from a brief — so including one or two pieces based on real-world references or product specs will always strengthen your presentation. For businesses that need professional-grade product visuals without the portfolio-building timeline, we offer ready-made expertise.
Where can you learn 3D modeling? Best resources for self-study
Knowing where to learn is just as important as knowing what to learn. Whether you are pursuing 3D modeling and animation courses, looking to learn 3D modeling online for free, or searching for a structured curriculum, the resources below cover every learning style and budget.
Free resources
YouTube is the most accessible starting point for free 3D modeling tutorials, and the Blender community in particular has produced exceptional free content. Blender Guru’s “Donut Tutorial” is widely considered the best beginner introduction to Blender available anywhere, while Grant Abbitt’s channel covers a broad range of modeling and sculpting topics at a beginner-friendly pace. The official Blender documentation and manual are also underused resources — methodical learners who read through the documentation alongside video tutorials tend to develop a deeper understanding of why tools work the way they do, not just how to click them.
Paid course platforms
Structured courses on platforms such as Udemy, Coursera, and LinkedIn Learning offer a more guided experience than free YouTube content, with organized video lessons, project assignments, and in some cases certificates of completion. These platforms are best suited to learners who benefit from a clear curriculum sequence and accountability structures, rather than self-directed exploration. The investment is typically modest compared to formal education, and sales on Udemy in particular make most courses accessible at low cost. Paid courses do not replace hands-on practice, but they provide the scaffolding that prevents the aimless wandering that slows many self-taught learners.
Community-based learning
Learning in community accelerates progress in ways that solo study cannot replicate. Reddit’s r/blender is one of the most active and welcoming communities for beginner questions and work-in-progress feedback. Blender Artists forum offers deeper technical discussions and critique threads for more advanced learners. ArtStation is the industry-standard portfolio platform where studying professional work provides constant inspiration and a clear benchmark for quality. Sketchfab allows you to share interactive 3D models directly in the browser, making it ideal for getting feedback on model structure rather than just rendered images. Engaging with these communities consistently — not just when you are stuck — is one of the most effective accelerators available to a self-taught artist.
What are the main specializations in 3D modeling?
One of the most important decisions a beginner can make is choosing a direction. Learning how to do 3D modeling in general is a useful foundation, but progressing toward professional-level work requires specialization. The disciplines below represent the main branches of the field — each with its own tools, workflows, and career pathways. Understanding them early helps you learn 3D modeling with purpose rather than wandering between unrelated techniques.
Hard surface modeling
Hard surface modeling focuses on manufactured objects with clean, defined edges: vehicles, weapons, architecture, industrial equipment, and consumer products. It is the most common specialization for game artists and product visualization professionals, and it is where most beginners naturally start because the geometry is predictable and reference material is abundant. Blender and Maya are the primary tools, with Fusion 360 and other CAD applications used when dimensional accuracy is required alongside visual quality.
Organic and character modeling
Organic modeling covers creatures, human figures, and any form defined by natural, flowing curves rather than manufactured edges. It is technically demanding because the topology must support realistic deformation when the model is rigged and animated. Blender’s sculpting tools and ZBrush are the dominant software choices, and artists in this specialization typically develop strong anatomy knowledge alongside their technical modeling skills. Film, games, and advertising are the primary industries.
Environment and scene building
Environment artists create the worlds that characters and products inhabit — landscapes, interiors, cityscapes, and natural settings. This specialization combines hard surface and organic techniques and places a strong emphasis on composition, scale, and atmospheric lighting. Blender, Unreal Engine, and Unity are all relevant tools depending on whether the output is a still render or a real-time interactive experience. It is a broad discipline that rewards generalists who enjoy working across multiple skill areas simultaneously.
Digital sculpting
Digital sculpting treats the 3D workspace like virtual clay, using brush-based tools to push, pull, and carve form rather than manipulating individual polygons. ZBrush is the industry standard for high-detail sculpting in film and games, while Blender’s Sculpt Mode provides a capable and free alternative for learners. Sculptors typically work at extremely high polygon counts to capture fine surface detail, then bake that detail down to lower-resolution meshes for use in games or animation. The skill set overlaps significantly with traditional sculpture and illustration.
Procedural modeling
Procedural modeling uses node-based or code-driven systems to generate geometry algorithmically rather than by hand, making it ideal for complex repetitive structures, natural formations, and large-scale environments. Blender’s Geometry Nodes system has made procedural workflows accessible to a wider audience, while Houdini remains the professional standard for VFX and simulation work. This specialization suits analytically minded learners who enjoy systems thinking and the ability to make sweeping changes to a model by adjusting a single parameter.
Product visualization
Product visualization is the specialization focused on creating photorealistic renders of physical products for commercial purposes — e-commerce imagery, marketing campaigns, configurators, and digital showrooms. It demands a high level of material and lighting craft, as the goal is to make a 3D model indistinguishable from a real photograph. This is the specialization we at 3Dimerce operate at the professional end of: creating high-end, photorealistic product visuals for luxury and design brands where visual excellence is non-negotiable. The tools most associated with product visualization include Blender (Cycles renderer), KeyShot, and Cinema 4D, though the software matters less than the eye for light, material, and composition that defines this discipline.
How 3Dimerce helps businesses with professional 3D product visualization
While learning 3D modeling as an individual is rewarding, businesses in the design, luxury, and high-end product space require a different level of output — consistent, photorealistic results delivered at scale and with no compromise on quality. That is where we come in.
We specialize in creating sophisticated 3D product configurators that enable premium brands to showcase their products with stunning visual quality and blazing-fast performance. Our platform is purpose-built for the higher segment of the market, where visual excellence and tailored configuration options are non-negotiable.
Our platform offers several key advantages for businesses:
- Photorealistic 3D models with rendering quality that matches and reinforces premium brand positioning
- Highly tailored configuration options that give customers a true-to-product visual experience across every variant
- Scalable infrastructure that grows with your product range without proportional cost increases
- Seamless integration into existing e-commerce platforms and in-store sales environments
- Automated visual content generation that replaces slow, expensive traditional photography
Ready to elevate your product visualization beyond what traditional 3D modeling can achieve? Contact our team to discover how our 20+ years of expertise in 3D product configuration can transform your customer experience and accelerate your sales process.
Frequently Asked Questions
What should I do if I get stuck on a modeling project and feel overwhelmed?
Break the project into smaller, manageable pieces and focus on one element at a time. If you’re modeling a car, start with just the basic body shape before adding details like wheels or mirrors. Take breaks when frustrated, and don’t hesitate to search for specific tutorials addressing your exact challenge. Remember that getting stuck is a normal part of the learning process.
How can I tell if my 3D models are actually improving over time?
Keep a portfolio of your work organized by date to track visual progress. Focus on technical improvements like cleaner topology, better proportions, and more efficient modeling workflows rather than just visual appeal. Set specific benchmarks like ‘model a recognizable object in under 2 hours’ and track how your speed and quality improve over time.
Should I learn multiple 3D software programs simultaneously to become more versatile?
No, stick to one program for at least 6-12 months until you’re truly comfortable with its core features. Learning multiple programs simultaneously dilutes your focus and slows skill development. Once you master one software, the fundamental 3D concepts transfer easily to other programs, making subsequent learning much faster.
What are the most common mistakes beginners make that I should avoid?
The biggest mistakes include ignoring proper topology (edge flow), creating overly complex models too early, and not learning keyboard shortcuts. Many beginners also skip the fundamentals to jump into advanced techniques, which creates knowledge gaps that hurt long-term progress. Focus on clean, simple geometry before attempting detailed textures or complex animations.
How do I know when I'm ready to take on freelance 3D modeling work?
You’re ready when you can consistently complete projects similar to client requests within reasonable timeframes and deliver clean, professional-quality files. Build a portfolio with 8-10 diverse pieces, practice meeting deadlines with personal projects, and ensure you understand file formats, project organization, and basic client communication. Start with simple projects to build confidence and client reviews.
What hardware do I need to run 3D modeling software smoothly?
A mid-range computer with at least 16GB RAM, a dedicated graphics card (GTX 1660 or better), and an SSD hard drive will handle most beginner to intermediate projects. While high-end workstations are ideal, many successful artists started with modest setups. Prioritize RAM and graphics performance over CPU speed for better viewport performance and rendering capabilities.
How can I stay motivated during the inevitable learning plateaus?
Set small, achievable weekly goals and celebrate completing them, even if progress feels slow. Join online communities to share work and get encouragement from fellow learners. Regularly revisit and improve your early models to see concrete progress, and don’t compare your beginner work to professional artists with years of experience. Remember that plateaus are temporary and often precede major breakthroughs.