
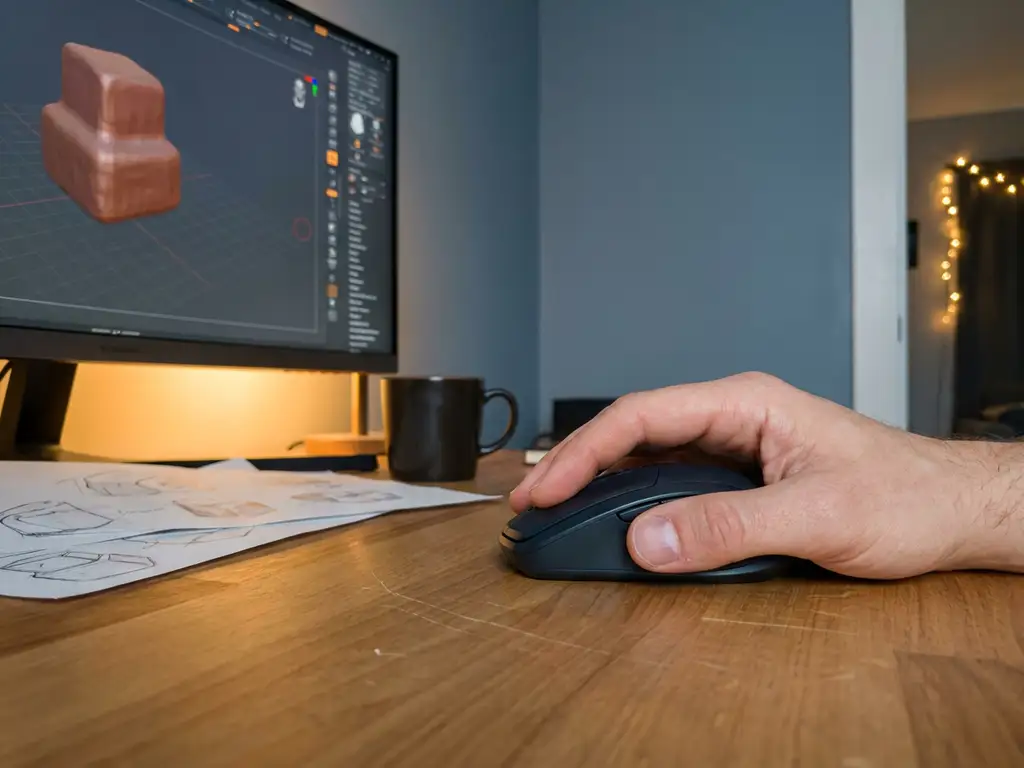
Blender 3D is a professional-grade, open-source 3D creation suite that is well-suited for beginners, though it comes with a blender difficulty level that requires patience and commitment. It offers capabilities that rival expensive commercial software at no cost. This article answers the most common questions beginners have before diving in.
Blender difficulty level: how steep is the learning curve for absolute beginners?
On a scale of 1 to 10, Blender scores around a 7 for absolute beginners. It is considerably more accessible than Maya or 3ds Max, but significantly more complex than tools like Canva or Tinkercad. The difficulty is real, but it is front-loaded: the first few weeks feel steep, and once the core concepts click, progress accelerates quickly.
Three specific areas create the steepest threshold for most newcomers:
- The interface layout. Blender’s workspace is dense and context-sensitive. Panels, menus, and toolbars change depending on which mode you are in, which can feel disorienting when you are not yet sure what mode you should be in. Most beginners need one to two weeks before the layout starts to feel logical.
- The volume of keyboard shortcuts. Blender is heavily shortcut-driven. While you only need a handful to get started, the sheer number of available shortcuts can make the software feel like it demands memorization upfront. The good news is that five to ten core shortcuts cover most early work, and the rest can be learned gradually.
- The mental model of 3D space. Working in three dimensions on a two-dimensional screen requires a spatial thinking shift that takes time to internalize. Understanding how to navigate the viewport, orient objects along axes, and think in X, Y, and Z simultaneously is the most fundamental hurdle, and it is one that every beginner works through.
The encouraging reality is that all three of these challenges are temporary. Most beginners experience a clear breakthrough moment after completing their first full tutorial, when the pieces suddenly start fitting together. Stick with it past that first wall, and Blender becomes a genuinely powerful tool at your disposal.
Is it normal to feel overwhelmed?
Absolutely. Almost every Blender user remembers their first week as a period of confusion, and that feeling has nothing to do with ability. It is a normal part of learning complex software. The breakthrough for most beginners comes after finishing their first complete tutorial from start to finish. One practical tip: measure your progress against where you were last week, not against advanced work you see on social media. That comparison is never fair to yourself, and your own week-over-week growth is the only metric that matters.
Which parts of the Blender interface are most confusing for beginners?
The Blender interface is one of the most frequently cited barriers for new users, and for good reason. It is designed for professional production workflows, which means it prioritizes flexibility and power over immediate simplicity. Understanding the four most confusing elements early on removes a significant amount of friction from the learning process.
Context-sensitive menus and editor modes
Blender operates across several modes, and the available tools change completely depending on which mode you are in. Object Mode is where you select, move, and arrange objects in your scene. Edit Mode is where you manipulate the geometry of a single object. Sculpt Mode is where you push and pull surfaces as if working with digital clay. Beginners frequently press a shortcut and find it does nothing, only to discover they are in the wrong mode. Knowing which mode you are in at all times, visible in the top-left corner of the viewport, is one of the first habits to build.
The volume of keyboard shortcuts
Blender’s shortcut system can look intimidating, but the blender basics you actually need to start are surprisingly few. The five most essential shortcuts for beginners are G (grab/move), R (rotate), S (scale), Tab (toggle between Object Mode and Edit Mode), and Shift+A (add a new object). These five shortcuts alone will carry you through weeks of early projects. The rest of the shortcuts can be discovered gradually as you encounter the need for them.
The Properties panels on the right side
The vertical strip of icon tabs on the right side of the screen controls different categories of settings for your scene and objects. The most relevant ones for beginners are the Material Properties tab (where you assign colors and surface finishes), the Render Properties tab (where you choose your render engine and settings), and the Object Properties tab (where you control position, rotation, and scale numerically). Ignore the rest until a tutorial specifically directs you there.
The 3D Viewport versus other editors
Blender contains multiple specialized editors, including the Shader Editor, the UV Editor, the Compositor, and others. This can make the software feel overwhelming when you first open it. The practical advice for beginners is straightforward: spend your first several weeks working exclusively in the 3D Viewport. The other editors exist for specific tasks you will not need until you are past the beginner stage. Blender software is modular by design, and you are not expected to use every part of it at once.
What can beginners actually make with Blender?
Beginners can make a wide range of 3D projects in Blender, even within their first few months. Starting expectations should be realistic, but the ceiling is genuinely high compared to most entry-level tools.
Here is what most beginners work toward in their first year:
- Simple 3D objects and props, such as furniture, household items, or abstract shapes
- Basic character models and sculpts
- Short animated sequences or looping motion graphics
- Product renders with lighting and materials applied
- Architectural visualizations of rooms or exteriors
- Stylized scenes for portfolios or social media
The quality of beginner output has improved significantly in recent years because of better learning resources and Blender’s own improvements to its rendering engines, Cycles and EEVEE. A motivated beginner following structured tutorials can produce portfolio-worthy renders within three to six months.
Blender animation for beginners: what is realistic?
Blender animation is one of the most exciting disciplines available in the software, and it is more accessible to beginners than many expect. The foundation of blender animation for new users is keyframe animation: setting the position, rotation, or scale of an object at specific points in time and letting Blender calculate the motion between those points. Before diving into animation, a solid grasp of basic modeling and viewport navigation is helpful, as these skills make it easier to set up scenes confidently. A realistic timeline for a first simple animation is around month two of consistent practice. The two most relevant editors to learn early are the Timeline, which controls playback and keyframe placement, and the Dope Sheet, which gives you a clear overview of all your keyframes at once. Start small, animate one object moving across the screen, and build from there.
Visual Commerce Solutions
Talk to our team about your project.
Best free Blender tutorials and learning resources for beginners
The best free resources to learn Blender 3D from scratch are the Blender Foundation’s official tutorials, the Blender Guru YouTube channel, and the Grant Abbitt channel. These cover everything from absolute zero to intermediate-level skills in a structured, beginner-friendly way.
Here is a suggested learning path using free resources:
- Blender Foundation’s official beginner tutorials — available on YouTube and Blender.org, these introduce the interface and core tools in a methodical way.
- Blender Guru’s Donut Tutorial — one of the most well-known beginner series online, it walks through modeling, texturing, lighting, and rendering using a simple but satisfying project.
- Grant Abbitt’s beginner series — particularly strong for character modeling and sculpting, with a calm and clear teaching style.
- Blender Artists Community forum — a free community where beginners can post work, ask questions, and receive feedback from more experienced users.
- CG Cookie and Blender Market free content — both platforms offer free tutorials and assets that supplement the core learning path.
Consistency matters more than the specific resource you choose. Thirty minutes of daily practice with any of these materials will produce faster results than sporadic marathon sessions.
A practical week-by-week Blender learning plan for beginners
Knowing which blender tutorial to follow is only half the challenge. Knowing when to do what is equally important, and the absence of a clear sequence is one of the main reasons beginners feel overwhelmed. The structured plan below covers your first three months and is designed around 30 minutes of daily practice.
- Week 1: Master the viewport and basic object manipulation. Focus exclusively on navigating the 3D Viewport, moving objects with G, rotating with R, scaling with S, and switching between Object Mode and Edit Mode with Tab. Do not touch any other features yet. Goal: feel comfortable moving around a 3D scene without getting lost. Time: 30 minutes per day.
- Week 2: Complete your first blender tutorial project. Follow Blender Guru’s Donut Tutorial from start to finish. This single series introduces modeling, materials, lighting, and rendering in the context of one satisfying project. Do not skip steps. Goal: finish your first complete render. Time: 30 minutes per day.
- Month 1: Complete one full beginner project independently. Choose a simple object you find interesting, a piece of furniture, a simple product, or a stylized prop, and model, texture, light, and render it without following a step-by-step guide. Use tutorials as reference when you get stuck, but push yourself to make decisions. Goal: a finished render you made yourself. Time: 30 minutes per day.
- Months 2 to 3: Choose one specialization and go deeper. Pick one area that interests you most: modeling and product visualization, character sculpting, or blender animation. Follow the recommended channels for that discipline (Blender Guru for visualization, Grant Abbitt for characters, and the Blender Foundation’s animation resources for motion). Blender basics become second nature during this phase as your focus narrows. Goal: a small portfolio piece in your chosen discipline. Time: 30 minutes per day.
This plan is deliberately conservative in scope. The goal is not to learn everything but to build momentum through completed work. Finished projects, even simple ones, teach more than half-finished attempts at complex ones.
Blender software vs. paid 3D programs: which should a beginner choose?
Blender in 2025: what has improved for beginners?
The current version of Blender is 4.x, and the improvements since the landmark 2.8 redesign have continued to lower the barrier for new users. The 2.8 update introduced the modern interface that most tutorials now use, but subsequent versions have brought meaningful additions: a more capable Asset Library for managing reusable materials and objects, the EEVEE Next renderer with improved real-time visual quality, and better viewport performance on a wider range of hardware. If you encounter blender 3d tutorials recorded before version 2.8, treat them as historical reference only. The interface, shortcuts, and workflow shown in those older videos differ significantly from current blender software, and following them as a beginner will cause unnecessary confusion. Always look for tutorials made with version 2.8 or newer.
For beginners, Blender 3D competes directly with paid tools like Cinema 4D, Maya, and 3ds Max, and in many respects outperforms them as a starting point. The comparison below makes the key differences clear at a glance.
| Criteria | Blender | Cinema 4D | Maya | 3ds Max |
|---|---|---|---|---|
| Cost | Free | From approx. €59/month | From approx. €235/month | From approx. €235/month |
| Learning curve for beginners | Moderate | Moderate | Very high | High |
| Suitable for product visualization | Yes | Yes | Limited | Yes |
| Industry adoption (film/games) | Growing | Strong (motion graphics) | Dominant | Strong (architecture/games) |
| Free tutorials available | Extensive | Limited | Moderate | Moderate |
| Recommended for | Beginners, freelancers, product viz | Motion designers with budget | Studio professionals | Architecture and game studios |
For beginners, Blender offers the best value by a considerable margin. It is free, has the most extensive library of free tutorials, and is capable of professional-quality output across modeling, rendering, and animation. The main advantage paid software holds is industry adoption in large production studios, which matters if your goal is to work in film or games at a major company. For product visualization, freelance work, e-commerce, and personal creative projects, Blender is a fully capable and practical choice from day one. When product visualization at a professional scale is the goal, working with a specialist partner is the logical next step beyond what individual Blender learning can achieve.
What are the most common mistakes Blender beginners make and how do you avoid them?
Almost everyone who starts with Blender shares a handful of early experiences: the first hour where you feel like you have made nothing useful, the moment a shortcut suddenly stops working because you accidentally switched modes without realizing it, or the disappointment when a render looks completely different from what you expected. These are not signs of failure. They are the standard beginner experience, and the mistakes behind them are predictable enough to prepare for in advance.
Skipping the fundamentals
Many beginners jump straight into complex projects before understanding how the viewport, Object Mode, and Edit Mode interact in Blender. Without this foundation, even simple tasks become frustrating. Spending time on the basics — even if it feels slow — pays off significantly within the first month.
Ignoring mesh topology
Beginners often focus entirely on how something looks and ignore how the underlying geometry is structured. Poor topology causes problems when animating, subdividing, or exporting models for use in other applications. Learning to keep geometry clean and logical from the start saves considerable rework later.
Other frequent mistakes include not saving incremental versions of work, overlooking the importance of lighting when evaluating a render, and underestimating how much material and shader knowledge affects the final visual quality of a scene.
Should beginners use Blender or a simpler 3D tool first?
Beginners should start with Blender directly rather than using a simpler 3D tool first, provided they are willing to invest consistent time over several weeks. Simpler tools like Tinkercad are designed for specific use cases and do not build the transferable skills that Blender teaches. Starting with Blender means every skill you develop has long-term professional value.
It also helps to remember the 80/20 principle as it applies to learning Blender: the software contains dozens of specialized tools, but beginners can complete roughly 80% of their early projects using just 10 to 15 core functions. Those core tools are the ones you already know from the basics: G to move, R to rotate, S to scale, E to extrude geometry, Ctrl+R to add loop cuts, and the fundamental material controls in the Shader Editor. Framing Blender this way transforms it from an overwhelming application into a manageable skill set you build one layer at a time.
The argument for starting simple usually comes from the assumption that Blender is too discouraging for newcomers. This was more valid before the 2.8 interface redesign, but in 2025 the software is genuinely more approachable than it once was. The learning curve is real, but it is not a wall.
If your goal is purely functional — for example, creating basic geometry for 3D printing or simple game assets — a focused beginner tool may get you to that specific outcome faster. But if your goal is to develop meaningful 3D skills for visualization, design, or creative work, starting with Blender is the more efficient long-term choice.
How 3Dimerce Delivers Professional 3D Product Visualization for Design-Led Brands
Learning Blender 3D is a rewarding journey, but for brands and manufacturers that need high-quality, photorealistic product visuals at scale, a dedicated professional platform delivers results that go far beyond what individual 3D learning can achieve alone. That is where we come in.
At 3Dimerce, we specialize in building premium visual product experiences for design-led brands and manufacturers across Europe. We work exclusively in the high-end, design-forward segment — where visual quality, brand consistency, and tailored execution are non-negotiable. Our platform is built for businesses that need stunning, consistent product visuals across every channel, without the cost and complexity of traditional photography.
Here is what we offer that Blender alone cannot:
- Real-time 3D product configurators that let customers customize and visualize products instantly, online or in-store
- Photorealistic CGI imagery produced at scale, covering every product variant without a single physical photoshoot
- Seamless integration with existing webshops and point-of-sale environments through headless architecture
- A virtual photo studio that replaces slow, expensive photography workflows with agile digital production
- Omnichannel consistency, ensuring your brand looks equally premium online, in print, and in retail
Whether you are a furniture manufacturer launching a new collection or a luxury retailer looking to offer online product customization, we have the tools and experience to make it happen beautifully. Get in touch with us to explore what a professional 3D product experience could look like for your brand.
Frequently Asked Questions
How long does it realistically take to get good enough at Blender to produce professional-looking work?
Most dedicated beginners can produce portfolio-worthy renders within three to six months of consistent daily practice, typically 30 to 60 minutes per day. Reaching a level where you can take on freelance or commercial work usually takes between one and two years, depending on your focus area. Modeling and rendering tend to come faster than animation or rigging, so specializing early can accelerate your timeline considerably.
What computer specs do I need to run Blender as a beginner?
Blender can run on most modern computers, but for a comfortable beginner experience you should aim for at least 16GB of RAM, a dedicated GPU with 4GB or more of VRAM, and a multi-core CPU. For rendering, an NVIDIA GPU with CUDA or RTX support will dramatically speed up Cycles renders compared to CPU-only rendering. If your hardware is limited, using Blender’s EEVEE renderer instead of Cycles is a practical workaround, as it is far less resource-intensive while still producing impressive results.
Can I use Blender to create assets for game engines like Unity or Unreal Engine?
Yes, Blender exports directly to formats like FBX, OBJ, and glTF that are fully compatible with Unity, Unreal Engine, and most other game engines. However, game-ready assets require specific considerations such as low polygon counts, properly baked textures, and clean UV unwraps, which are slightly different skills from general modeling. Many game developers use Blender as their primary asset creation tool, and there are dedicated tutorials covering the Blender-to-game-engine pipeline specifically.
What is the single most important thing a beginner should focus on first in Blender?
The single most important skill to develop first is comfort with the 3D viewport: how to navigate it, understand the three-dimensional space, and switch between Object Mode and Edit Mode confidently. Without this spatial foundation, every other task in Blender becomes unnecessarily difficult. Spend your first week doing nothing but navigating, moving objects, and making simple edits before touching any advanced features.
Are there any common keyboard shortcuts every Blender beginner should memorize early on?
A small set of shortcuts will cover the majority of your early workflow: G (grab/move), R (rotate), S (scale), Tab (toggle Edit Mode), Numpad keys for viewport angles, Ctrl+Z for undo, and Shift+A to add new objects. Learning to use the middle mouse button for viewport navigation is equally important. Blender’s built-in shortcut overlay and the free Quick Favorites menu (Q key) make it easier to build muscle memory gradually without trying to memorize everything at once.
Is it worth paying for premium Blender courses, or are free resources sufficient for beginners?
Free resources are genuinely sufficient to take a complete beginner to an intermediate skill level, and paid courses are not necessary to get started. That said, premium courses from platforms like CG Cookie or dedicated instructors can offer more structured progression, project-based learning, and direct feedback, which some learners find worth the investment after exhausting the free material. A reasonable approach is to complete the major free learning paths first, then invest in a paid course once you have a clearer sense of which specialization, such as character art, product visualization, or motion graphics, you want to pursue.
What should I do when I get stuck or frustrated during the Blender learning process?
Getting stuck is a normal and expected part of learning Blender, and the most effective response is to isolate the specific problem rather than abandoning the project entirely. The Blender Artists Community forum, the official Blender Stack Exchange, and the r/blender subreddit are all active communities where beginners receive fast, helpful answers. If frustration is coming from the scope of a project, scaling it down to a simpler version of the same concept is often more productive than starting something entirely new.